Ctrl + H in Excel: Functions and How to Use It
Home >> Excel Tutorials from Compute Expert >> Excel Tips and Trick >> Ctrl + H in Excel: Functions and How to Use It


From this tutorial, you will know what are the functions of and how to use Ctrl + H in Excel.
We have many shortcuts that we can use in Excel to make us work faster. One of those shortcuts is Ctrl + H. If we can use this shortcut correctly, we should be able to edit many data inputs easier, especially if we have a large data table in Excel.
Want to know more about this shortcut and how to use it correctly? Read this tutorial until its last part.
Disclaimer: This post may contain affiliate links from which we earn commission from qualifying purchases/actions at no additional cost for you. Learn more
Want to work faster and easier in Excel? Install and use Excel add-ins! Read this article to know the best Excel add-ins to use according to us!
Table of Contents:
Functions of Ctrl + H in Excel
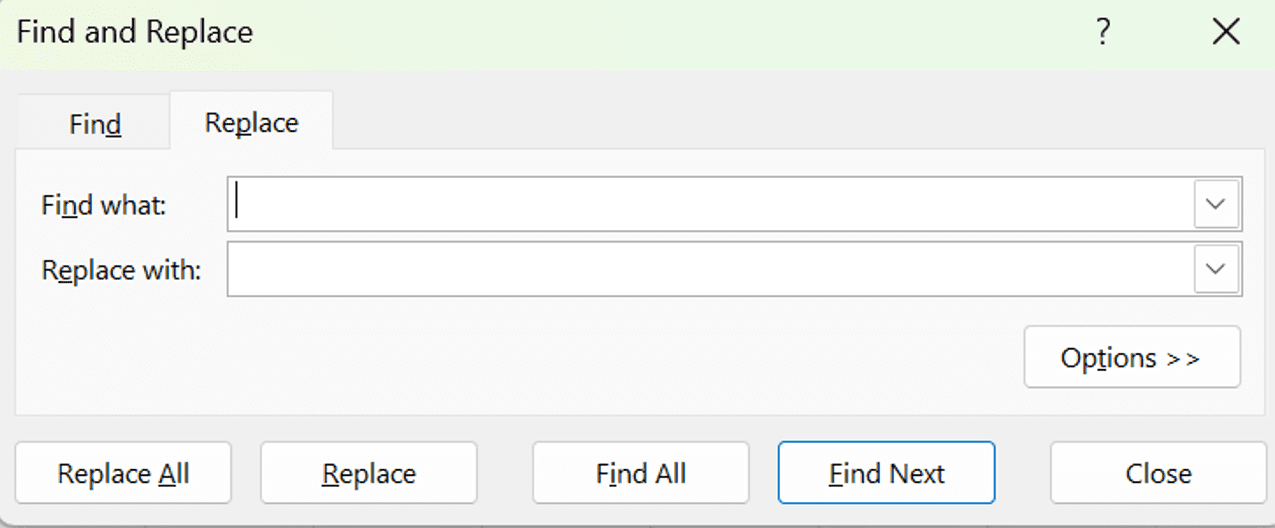
We can use Ctrl + H in Excel to show up the “Find and Replace” dialog box, with its “Replace” tab selected. This function is particularly handy when we want to replace a lot of similar data or data that is hard to find in our worksheet.Here is a screenshot of the dialog box that will show up when we use the Ctrl + H shortcut in Excel.
How to Use Ctrl + H in Excel
To summon the “Find and Replace” dialog box by using Ctrl + H in Excel, just press Ctrl and H buttons simultaneously on your keyboard. Excel should immediately display the dialog box for you.After that is done, you just need to specify the data you want to replace and the replacement you want in the spaces provided in the dialog box. Then, just click the “Replace” or “Replace All” button to begin the replacement process.
To understand better the “Find and Replace” dialog box that shows up after you press Ctrl + H, here are their parts and a bit of explanation on their functions.
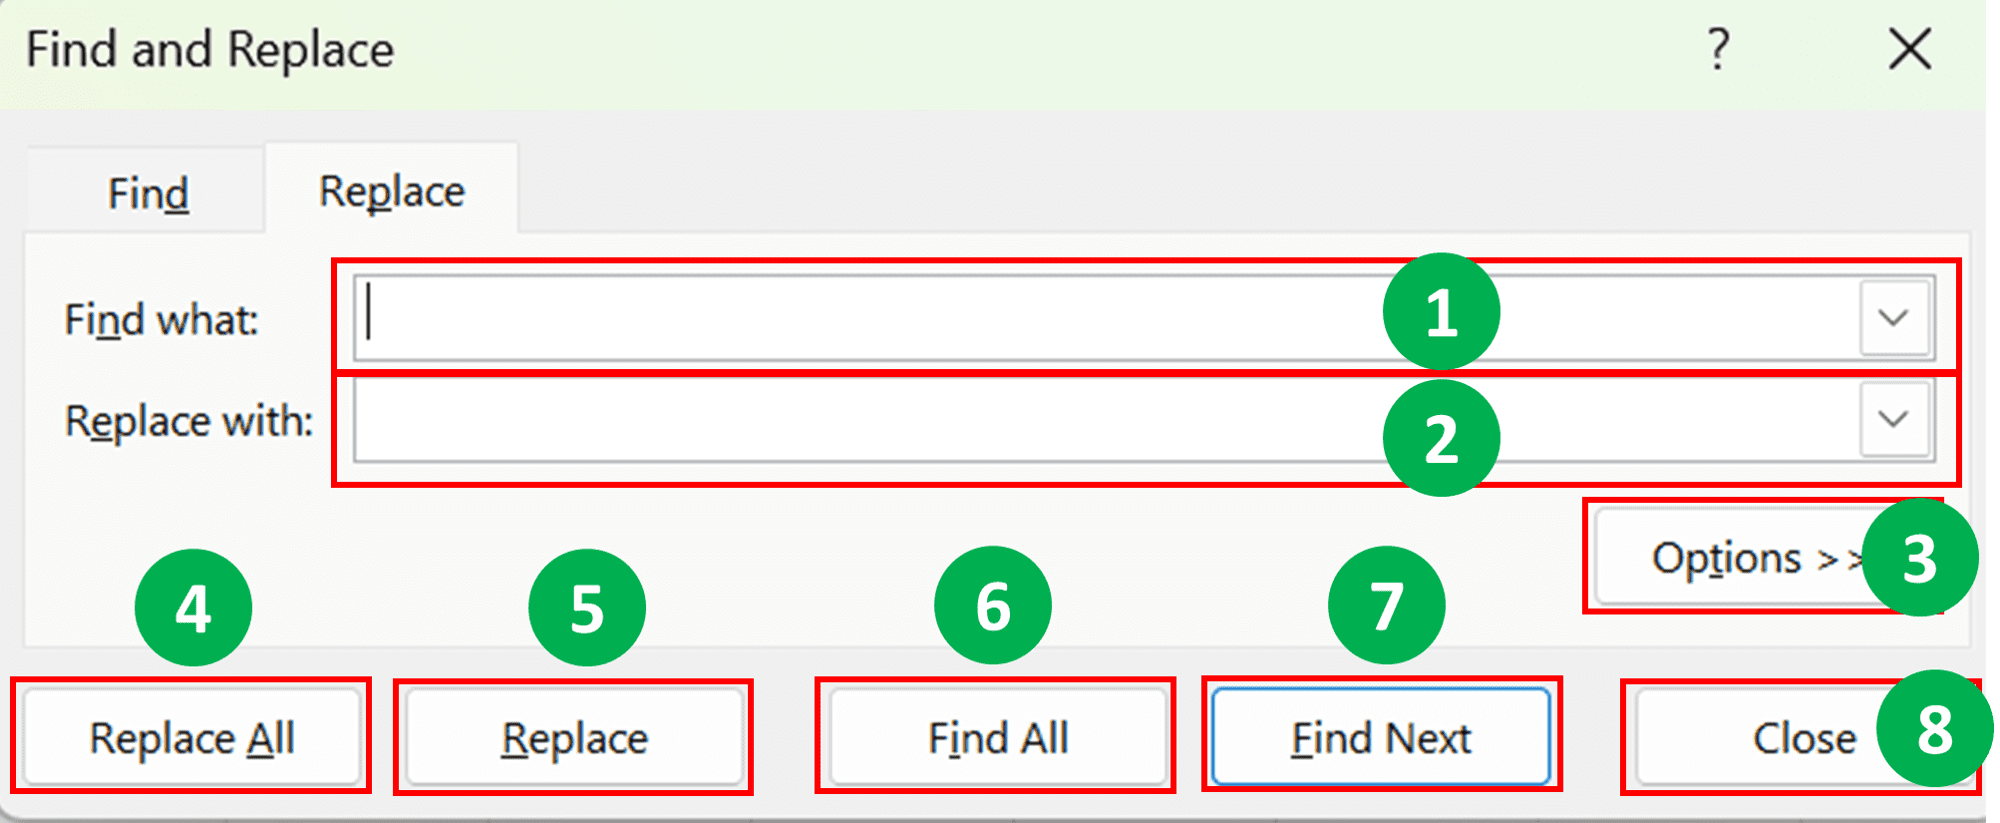
- “Find what” text box: The text box where you input the data you want to replace
- “Replace with” text box: The text box where you input the data you want as the replacement
- “Options” button: Open up advanced replacement process settings
- “Replace All” button: Replace all of the instances of the data you want to replace
- “Replace” button: Replace the data you want to replace in the currently active cell if it has one
- “Find All” button: Find all of the instances of the data you want to replace. The instances will be listed at the bottom of the dialog box for you to select
- “Find Next” button: Find the next instance of the data you want to replace from the currently active cell position
- “Close” button: Close the “Find and Replace” dialog box
If you click the “Options” button, advanced replacement process settings will show up for you to configure. Here are the settings in there and a bit explanation of what we can use them for.
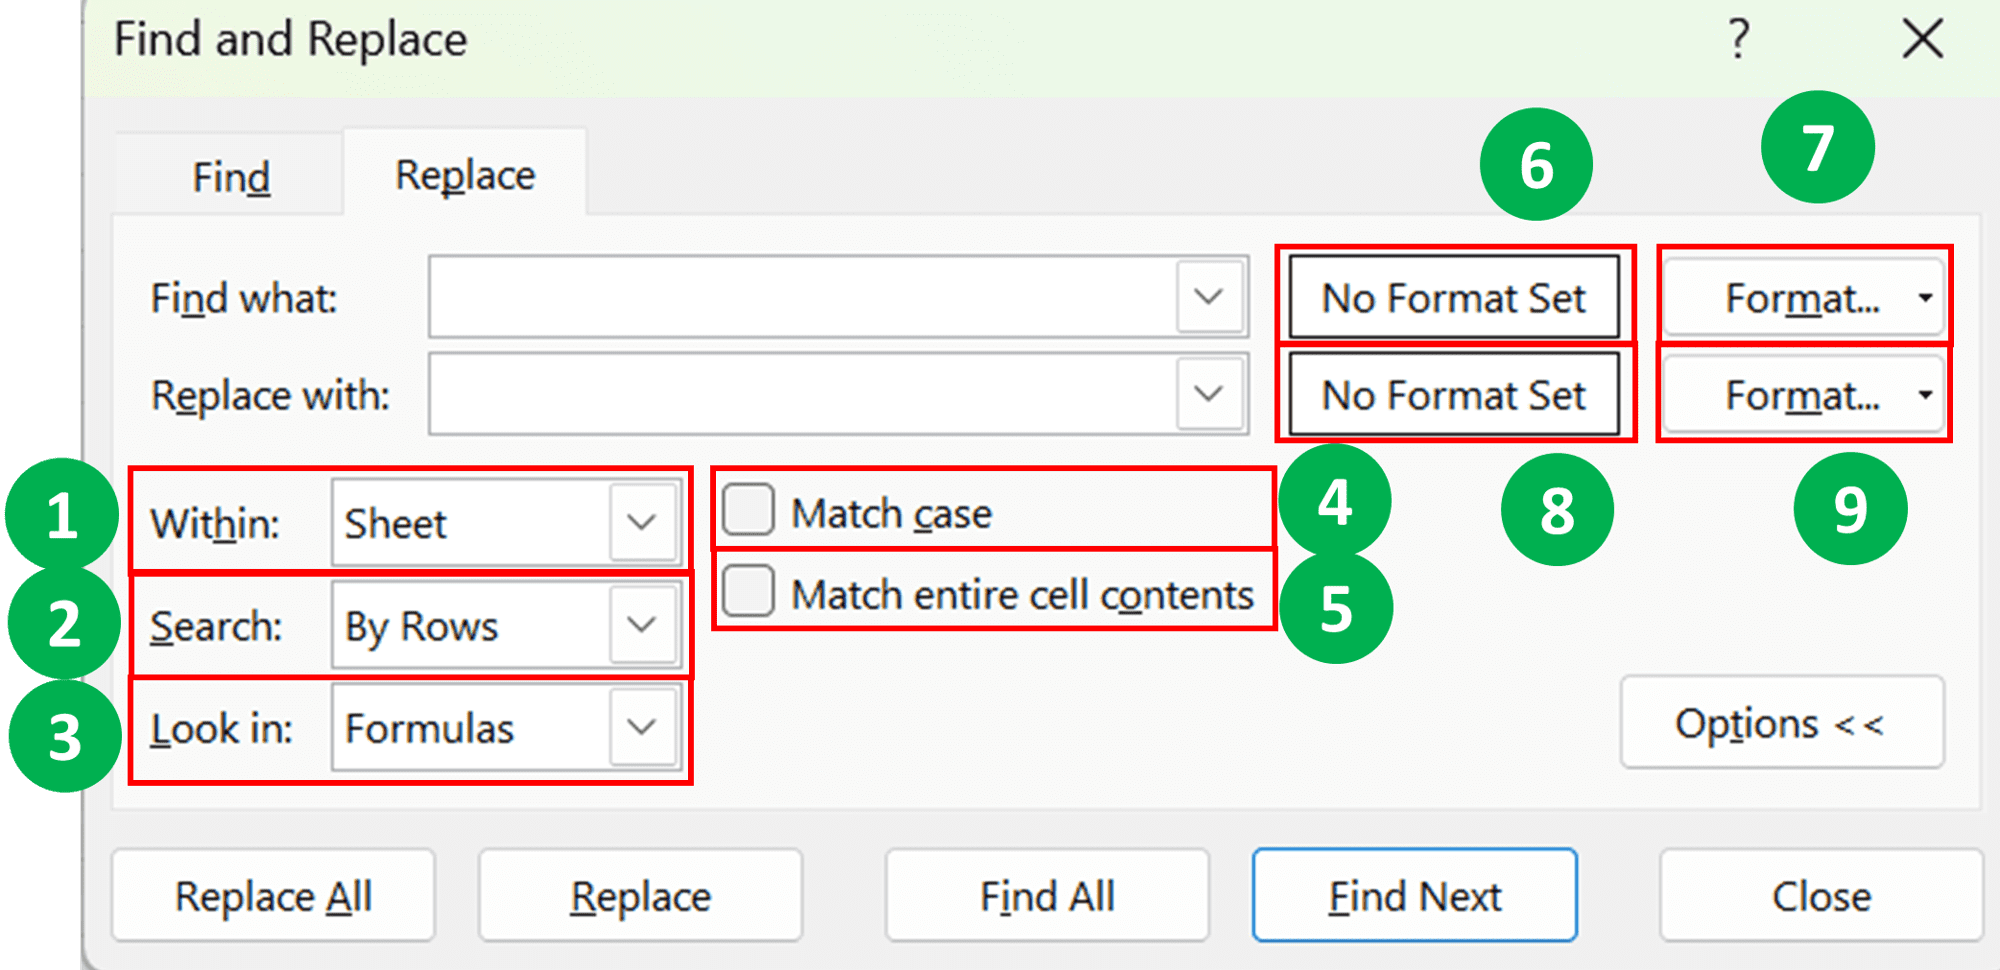
- “Within” dropdown button: Determine the scope of your data replacement process. You can choose between the active worksheet (Sheet) or the whole workbook (Workbook)
- “Search” dropdown button: Determine the direction of the search process for the instance you want to replace. You can choose between searching from left to right before from top to bottom (By Rows) or from top to bottom before from left to right (By Columns)
- “Look in” dropdown button: Determine where you want to look at in a cell for the data you want to replace. However, for the “Replace” tab of the “Find and Replace” dialog box, you can only choose to look at the formula part of the cell
- “Match case” checkbox: Determine whether Excel should match the letter case of the data you want to replace or not in its search process. Check if you want to match it and don’t check it if not
- “Match entire cell contents” checkbox: Determine whether Excel should find cells whose entire content must match the data you want to replace or if just a part of its content is okay. Check if you want cells with the entire content match only and don’t check if you are okay with only a match on a part of their content
- “Find what” format preview: Preview the format of the data you want to replace if you specify it
- “Find what” format dropdown button: Specify the format of the data you want to replace. You can choose to specify the format through the “Format” dialog box or copy it from a cell
- “Replace with” format preview: Preview the format of the data you want as the replacement if you specify it
- “Replace with” format dropdown button: Specify the format of the data you want as the replacement. You can choose to specify the format through the “Format” dialog box or copy it from a cell
Exercise
After you have learned about the Ctrl + H shortcut in Excel and the “Find and Replace” dialog box that it shows, now is the time for you to try the shortcut on your own.Open an Excel file and try to replace some data by using Ctrl + H. Play around also on the advanced replacement process settings in the “Find and Replace” dialog box that the shortcut summons. Can you use Ctrl + H to do the data replacement you want?
Additional Notes
- In Mac, the shortcut to show the “Find and Replace” dialog box with the “Replace” tab selected is Ctrl + H too
- To show the “Find and Replace” dialog box with the “Find” tab selected, the shortcut is Ctrl + F
Excel articles/tutorials you might want to learn too: