How to Protect Sheets in Excel
Home >> Excel Tutorials from Compute Expert >> Excel Tips and Trick >> How to Protect Sheets in Excel


In this tutorial, you will learn how to protect sheets in excel using various methods.
When working in excel, we sometimes want to protect the contents in our sheets so people cannot edit them carelessly. The contents are probably some formulas or data that are crucial for the data processing in our excel workbook.
To protect the contents you have in excel, one of the basic things you can do is to protect your worksheets. There are methods you can utilize to add this protection so your data can be safer from unprecedented change.
Want to understand what are those methods and the steps you need to follow to utilize them? Read this tutorial until its last part!
Disclaimer: This post may contain affiliate links from which we earn commission from qualifying purchases/actions at no additional cost for you. Learn more
Want to work faster and easier in Excel? Install and use Excel add-ins! Read this article to know the best Excel add-ins to use according to us!
Table of Contents:
- Note about sheets protection in excel
- How to protect sheets in excel 1: format menu
- How to protect sheets in excel 2: protect sheet button
- How to protect sheets in excel 3: right-click menu
- How to protect sheets in excel 4: shortcut buttons (Windows only)
- How to protect/unprotect specific cells of a protected worksheet
- Exercise
- Additional note
Note About Sheets Protection in Excel
When you protect your sheets, you may think that helps to secure your data from people who have bad intentions. However, this is not the case for sheets protection in excel as there are many ways to break it.Even if you add passwords when you protect your sheets, that doesn’t guarantee your data security in excel at all. There are methods to unprotect sheets in excel forcefully, even without having to know the password you add. People can search those methods online and implement them immediately to break the protection of your sheets.
So, if this is true, then what is the purpose of learning the methods to protect sheets in excel? Well, the protection can at least protect your data from careless or unintentional editing.
When you work in excel, you may have some formulas or data that are crucial for your data processing processes. When you need to give this excel file to your colleagues, you should protect them so they won’t edit them needlessly. By adding the protection, your data processing processes should be fine and your colleagues will only input data in “safe” places.
Therefore, the key point here is don’t use the sheets protection feature in excel for data security purposes! When people have bad intentions and really want to break your sheets’ protection, they can and will do it. Use the sheets protection feature instead to not let people edit the contents of your worksheet carelessly and/or unintentionally.
How to Protect Sheets in Excel 1: Format Menu
With the discussion we had just now in mind, now let’s discuss the methods to protect sheets in excel. The first method we will discuss here is by using the format menu.So, how to implement this format menu method to protect our sheets in excel? Here are the steps to do it.
-
Activate the sheet you want to protect by clicking on the worksheet tab if you haven’t activated it yet

-
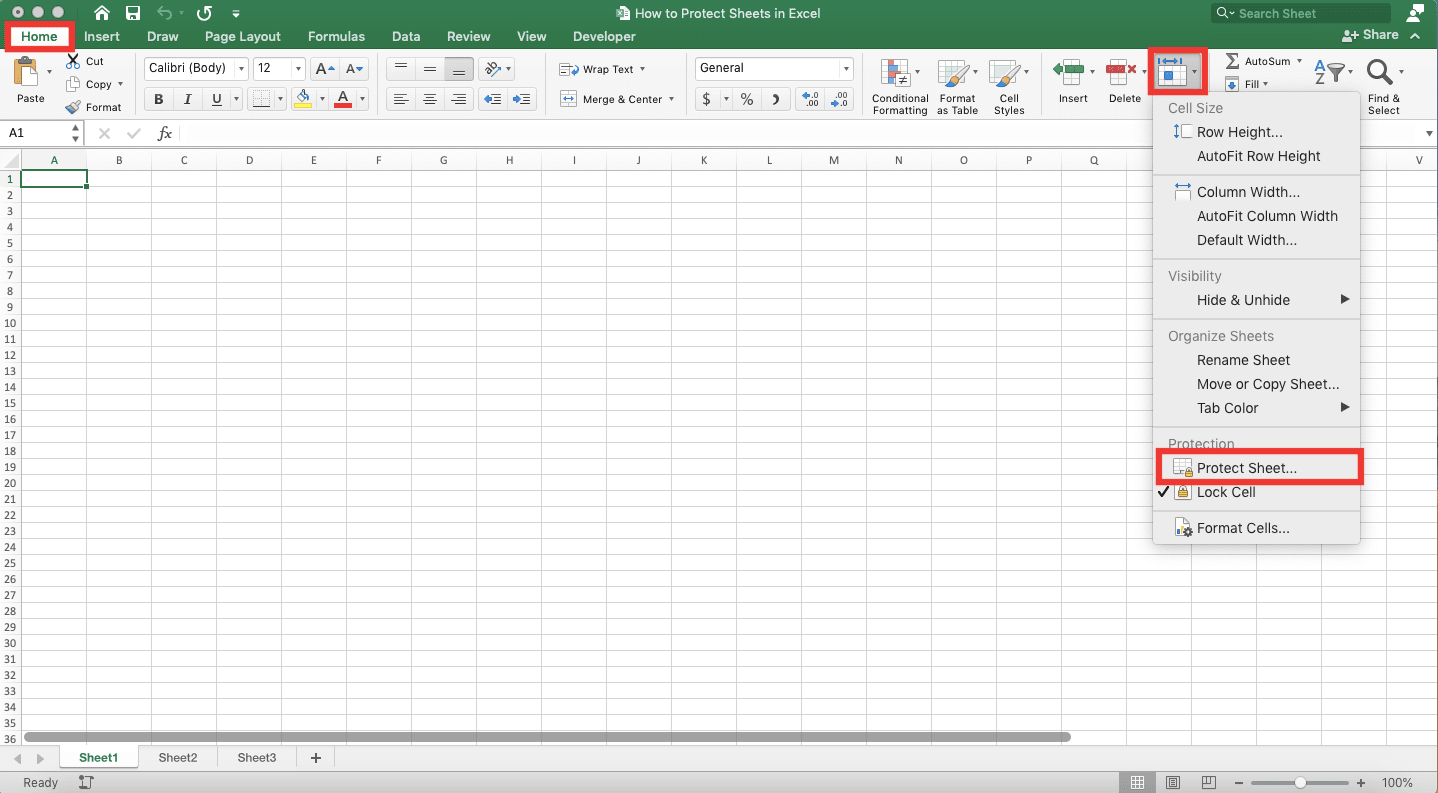
Go to the Home tab, click the Format button, and choose Protect Sheet…
-
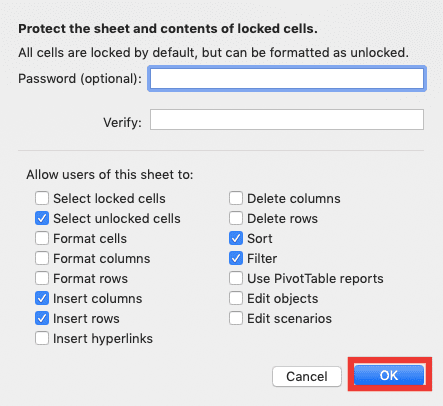
Input a password to unprotect the sheet later if you want. Type it in the two text boxes in the dialog box that shows up. If you don’t want to set a password, leave the text boxes blank
Set also your sheet protection settings in the area below the password text boxes. Check the checkbox of the things you want to allow when you have protection on your sheet

-
Click OK if you have finished setting the password and the sheet protection settings

-
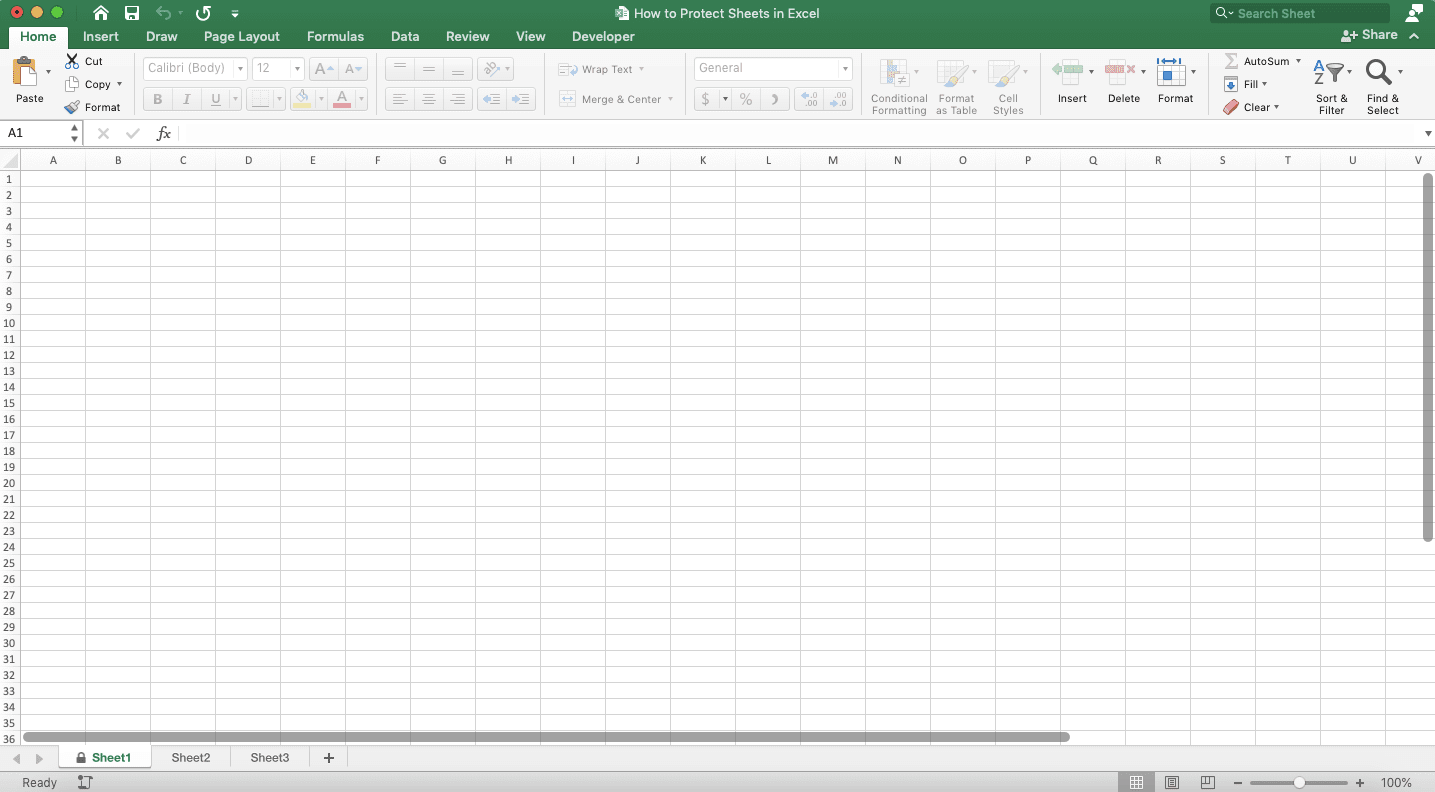
Done!
How to Protect Sheets in Excel 2: Protect Sheet Button
Besides the format menu in the Home tab, we can also protect our sheet through the excel protect sheet button. Here are the steps you need to follow to use this button.-
Activate the sheet you want to protect by clicking on its worksheet tab if you haven’t activated it yet
-
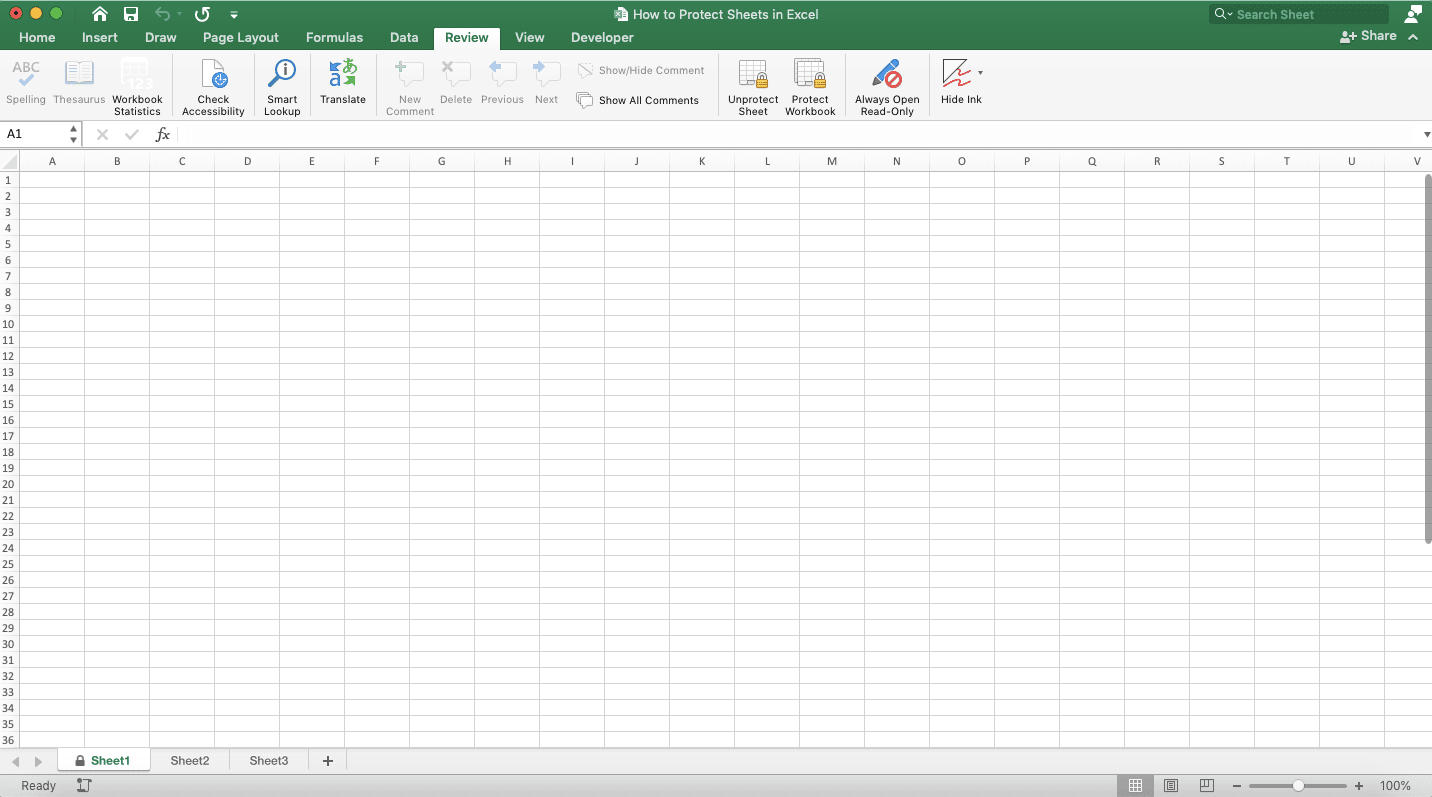
Go to the Review tab and click the Protect Sheet button there

-
Input a password to unprotect the sheet later in the two text boxes in the dialog box that shows up. If you don’t want to have a password, just leave the two text boxes blank.
Also set your sheet protection settings in the area below the password text boxes. Check the checkbox of the things you allow people to do in the worksheet when you protect it

-
Click OK if you have finished with the password and the sheet protection settings

-
Done!
How to Protect Sheets in Excel 3: Right-Click Menu
The third method we can use to protect our sheet in excel starts by right-clicking our sheet tab first. Here are the detailed steps to utilize this method.- Right-click the sheet tab you want to protect
-
Choose Protect Sheets…

-
Input a password to unprotect the sheet later in the two text boxes in the dialog box that shows up. If you don’t want to have a password, you can just leave the two text boxes blank.
Set also the sheet protection settings in the area below the two password text boxes. Check the checkbox of the things you allow people to do in the worksheet when you protect it

-
Click OK after you finish with the password and the sheet protection settings
-
Done!

How to Protect Sheets in Excel 4: Shortcut Buttons (Windows Only)
If you want to use shortcuts instead to protect your worksheet, then activate the worksheet you want to protect first. Then, press Alt, then T, then P, and then P buttons. This will open the sheet protection dialog box where you can input your sheet protection password and manage its settings.The shortcut keys will only work if you use excel in Windows, though. This is the same as any other ribbon shortcuts in excel.
How to Protect/Unprotect Specific Cells of a Protected Worksheet
The default cells setting in excel is they will be protected when you protect their worksheet. However, you may sometimes want to leave some cells unprotected in a worksheet when you protect its other cells.To do this, you need to manage the protection settings of your cells before you protect your worksheet. Here are the steps you can follow to do it.
-
Highlight the cell range that contains all the cells which protection settings you want to manage

-
Choose Protect Sheets…
-
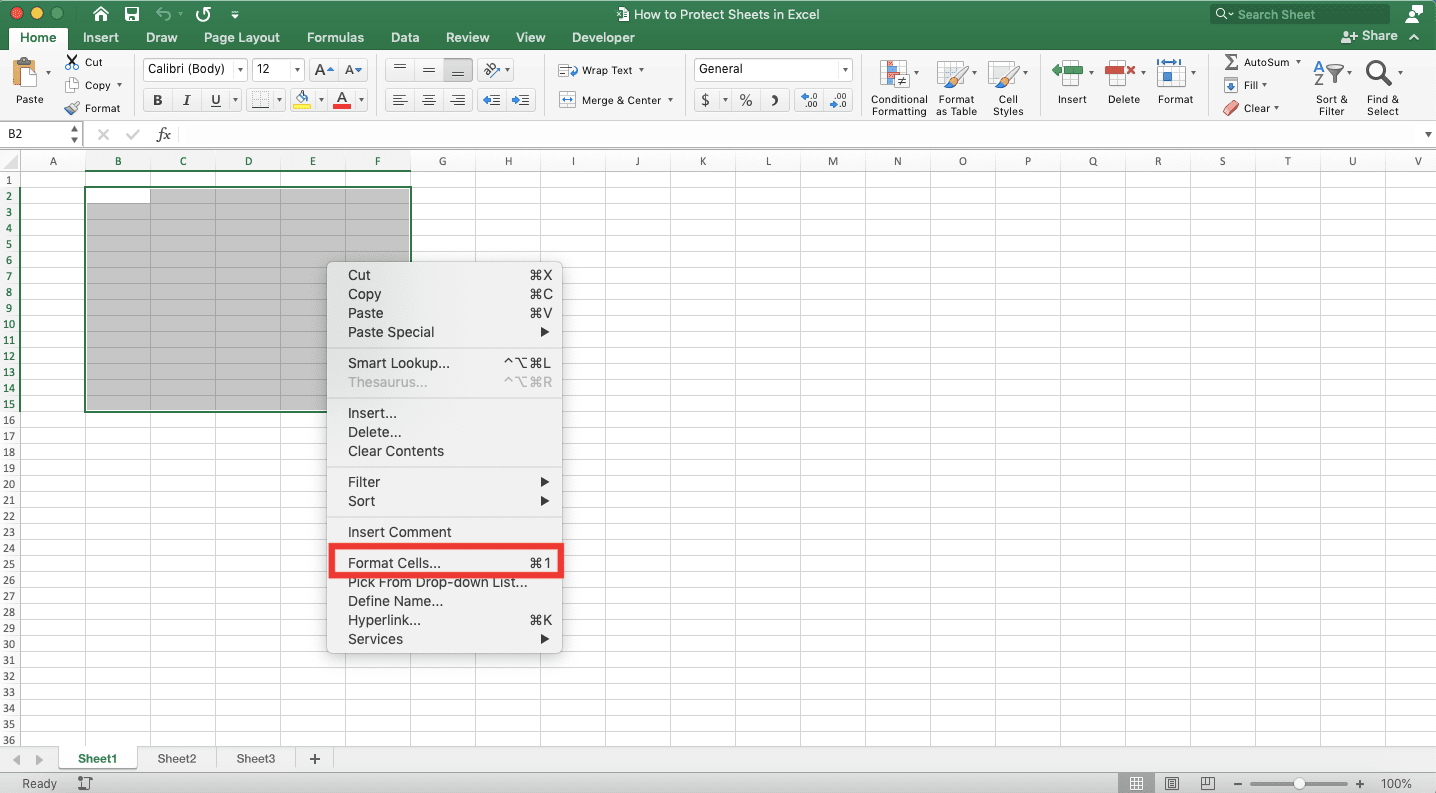
Right-click on the cell range you highlight and choose Format Cells….
You can also just press Ctrl + 1 (Command + 1 in Mac) buttons simultaneously

-
In the Protection tab menu, you can set your cells’ protection settings through the “Locked” checkbox. Remove the checkmark in this checkbox to unprotect the cells you currently highlight when you protect your worksheet. Add the checkmark if you want to protect them instead.
You can toggle the checkmark existence by clicking on the checkbox

-
After you have set the cells protection settings you want, click the OK button

-
Done! Now, the cells in the cell range should follow the protection settings you have set when you protect their worksheet

Exercise
After you have learned how to protect sheets in excel, now let’s practice your understanding a bit to sharpen it. Open a new excel file and try to protect the worksheets there using the methods we have discussed in this tutorial.What is the result? Can you do it?
Additional Note
You can protect only one sheet at a time in Excel (unless you use VBA or excel add-ins features).Related tutorials you should learn from: