How to Remove Gridlines in Excel
Home >> Excel Tutorials from Compute Expert >> Excel Tips and Trick >> How to Remove Gridlines in Excel
In this tutorial, we will learn completely about how to remove gridlines in excel.
Excel gridlines are the boundaries between cells that excel provides by default. With these gridlines, we can differentiate clearly between one cell and another and also know their row/column position. However, there maybe times when we might want to remove them so we can have a better worksheet interface.
Here, we will discuss 5 methods that you can implement to remove these excel gridlines. We will explain the detailed steps for each method so you can easily practice them. We will also give the implementation screenshot in excel for each step to make you understand them easier.
These five methods will give the same result, which is the removal of excel gridlines in your worksheet. Thus, it is up to you to choose which one you prefer to implement later.
Disclaimer: This post may contain affiliate links from which we earn commission from qualifying purchases/actions at no additional cost for you. Learn more
Want to work faster and easier in Excel? Install and use Excel add-ins! Read this article to know the best Excel add-ins to use according to us!
Table of Contents:
- How to remove gridlines in excel 1: view/page layout tab
- How to remove gridlines in excel 2: excel options
- How to remove gridlines in excel 3: changing the background color
- How to remove gridlines in excel 4: merge cells
- How to remove gridlines in excel 5: the shortcut buttons
- Exercise
- Additional note
How to Remove Gridlines in Excel 1: View/Page Layout Tab
-
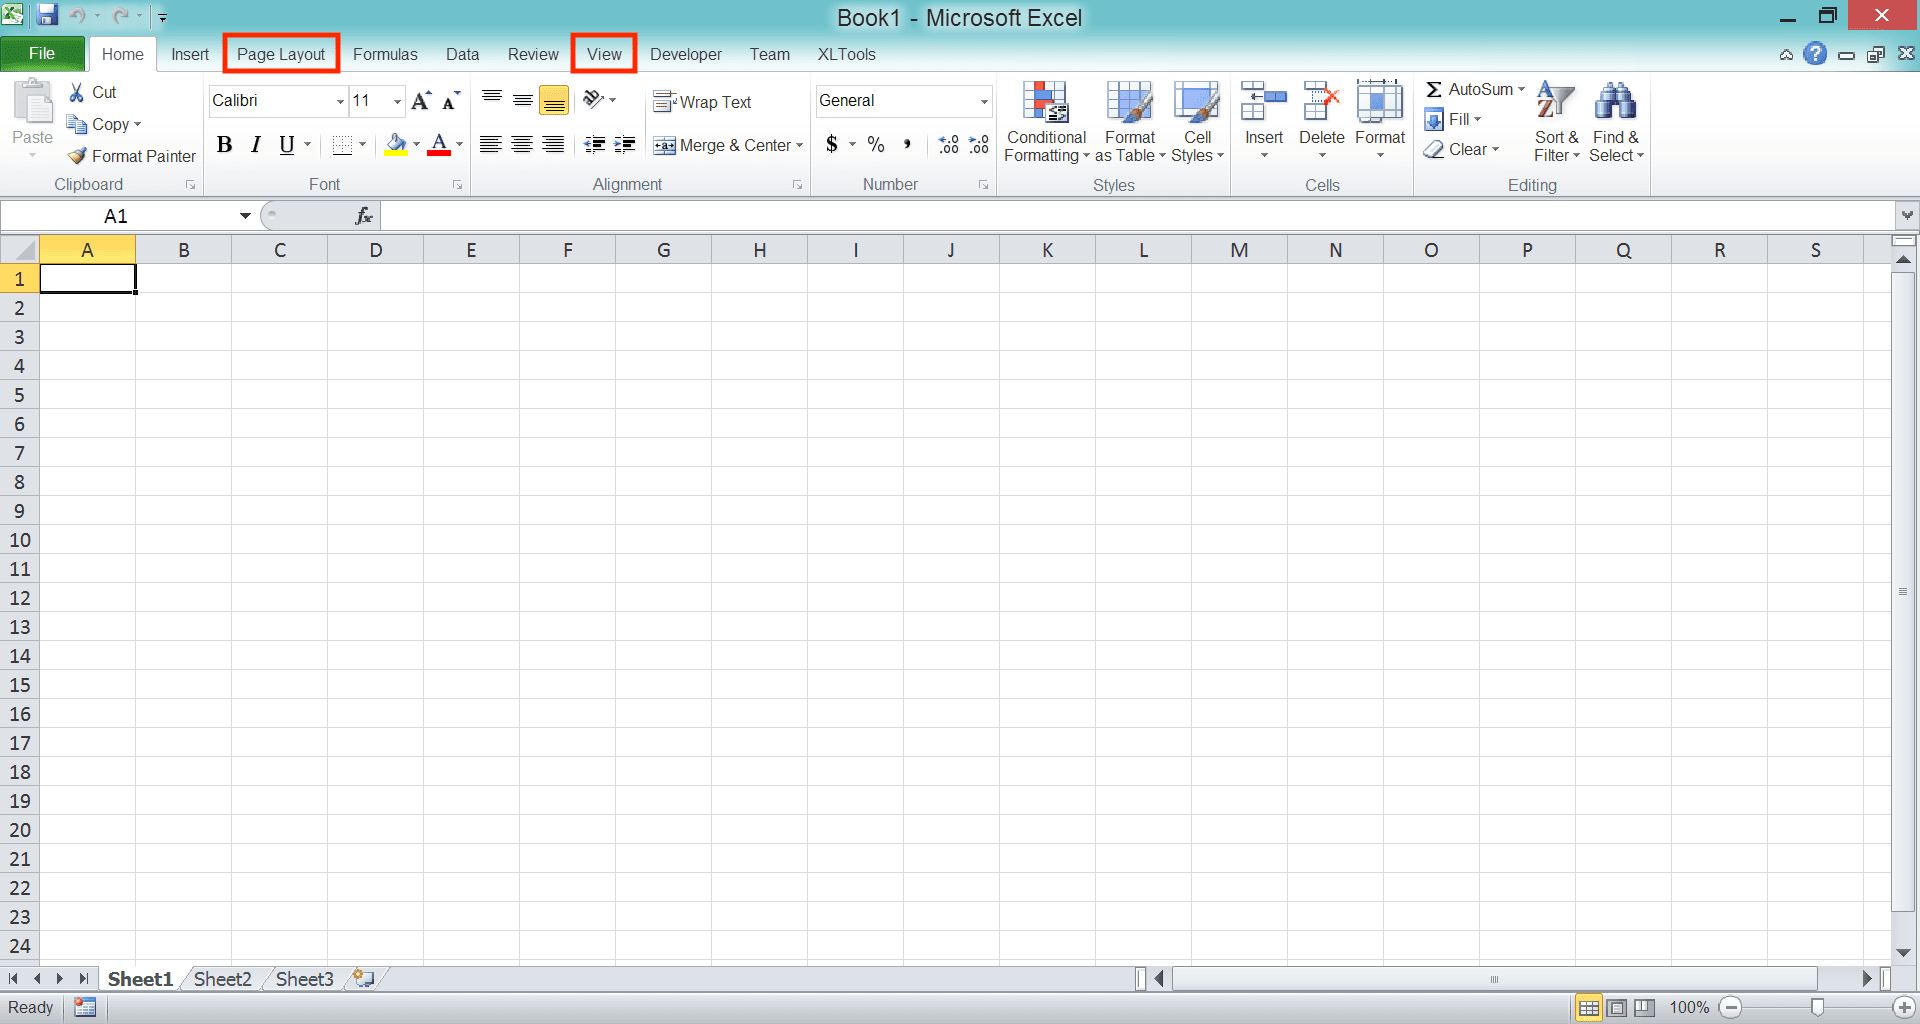
Click on the View or Page Layout tab in your excel file
-
Remove the checkmark in the Gridlines (View) or View Gridlines (Page Layout) checkbox by clicking it once. Later, if you want to show the gridlines again, just check the checkbox by clicking it again.


-
Done!

How to Remove Gridlines in Excel 2: Excel Options
-
Click File in the top left of your excel file (For Mac, click the Excel text in the top left of your Mac screen)

-
Click Options on the choices shown (For Mac, click Preferences…)

-
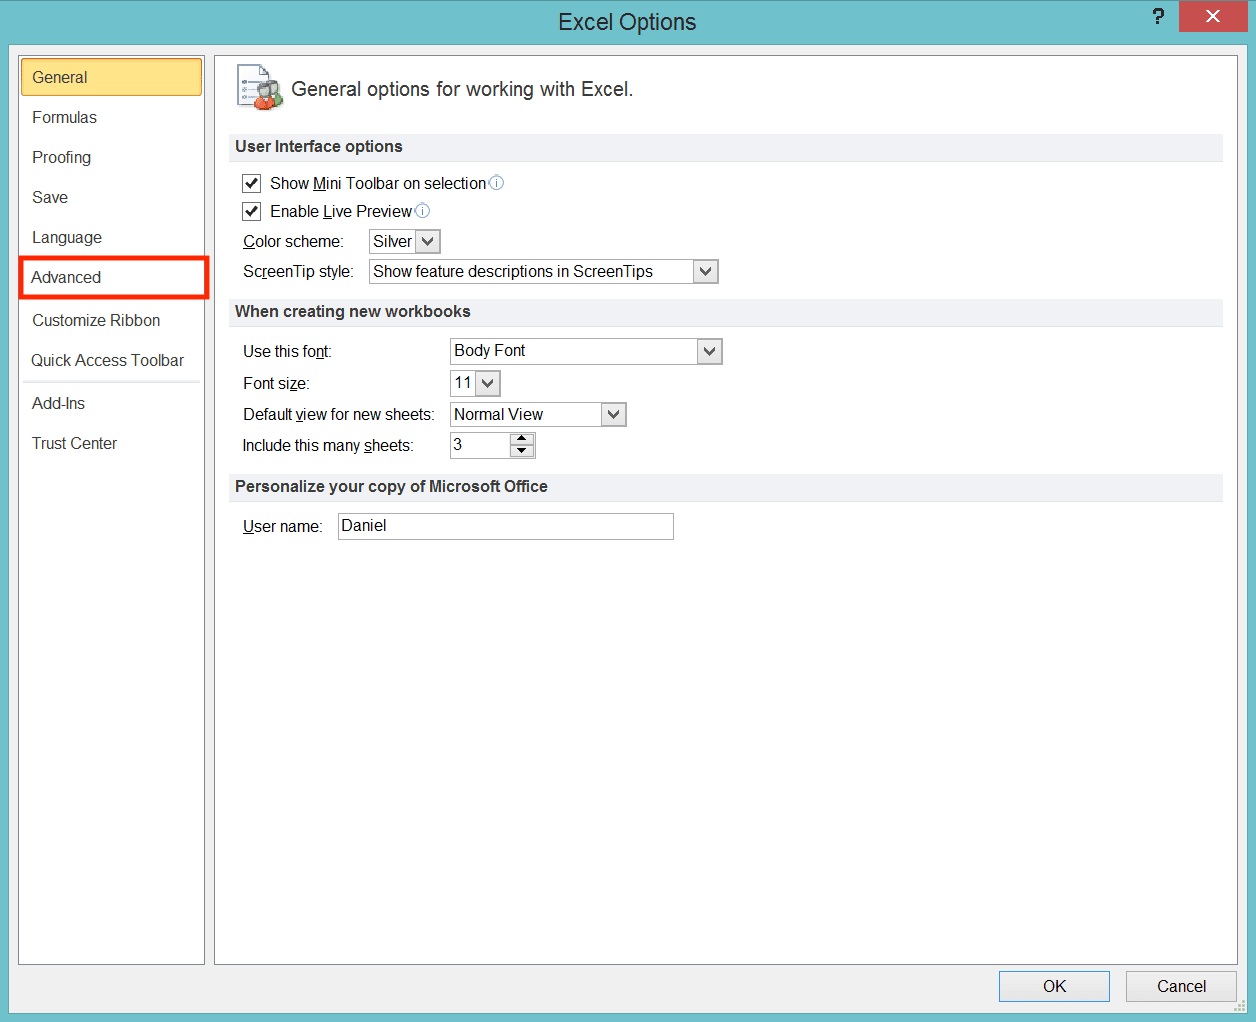
Click Advanced on the dialog box shown (For Mac, click View)
-
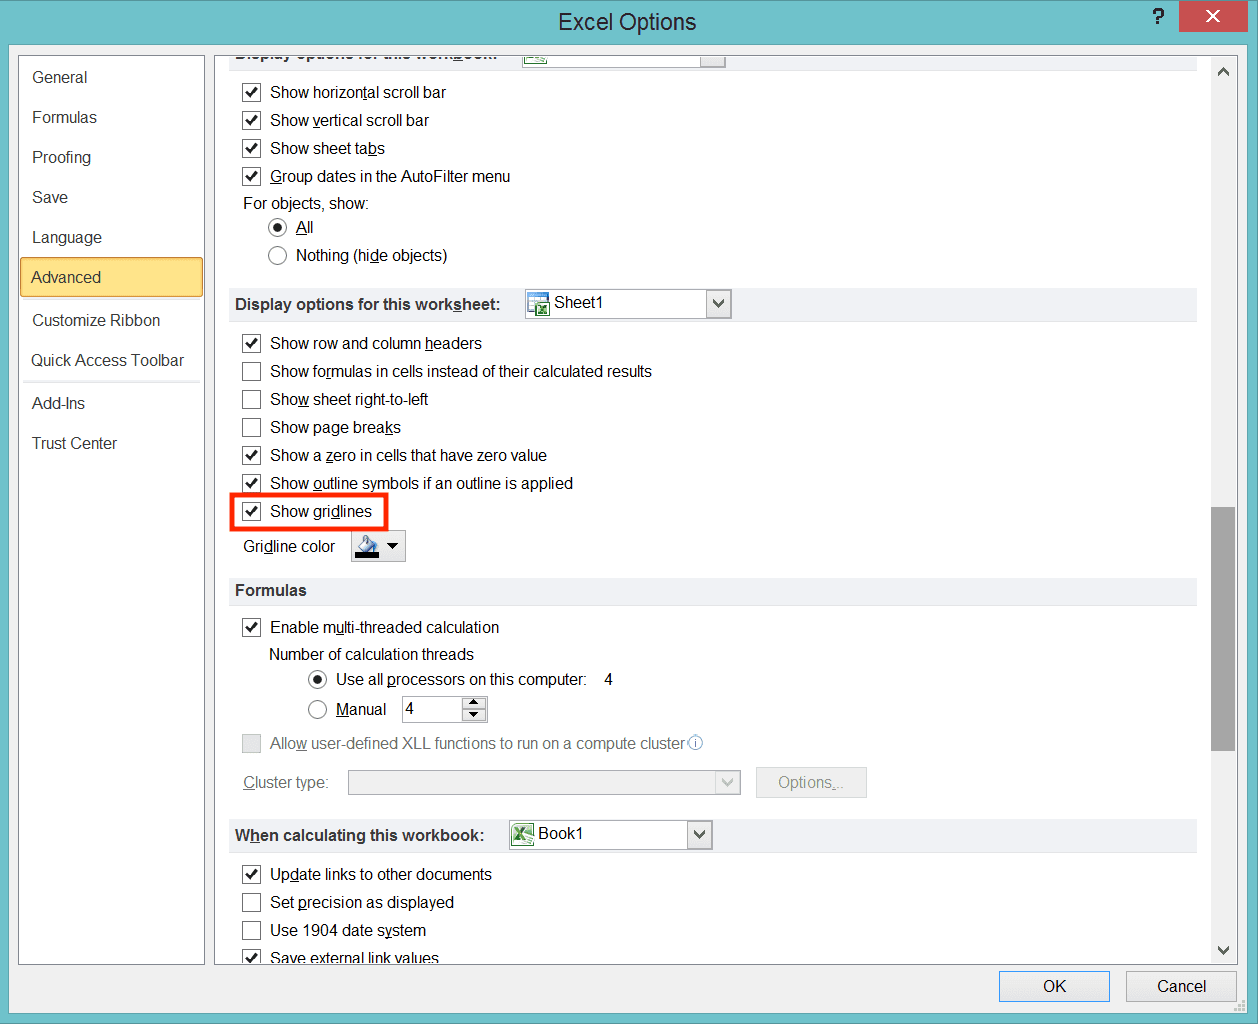
Find the Show Gridlines checkbox on the menu shown. Then, remove the checkmark by clicking it once
-
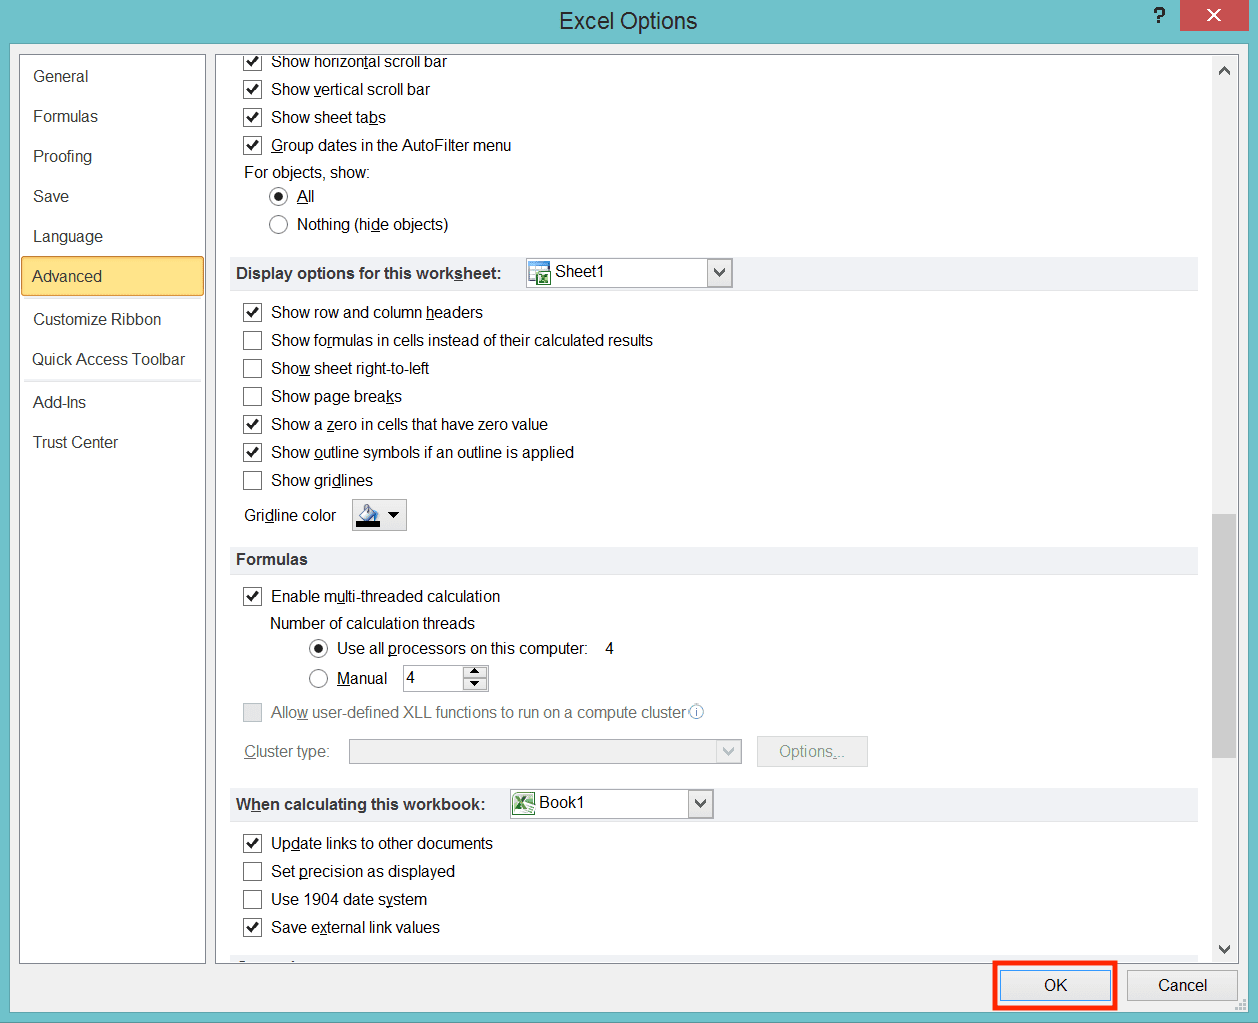
Click OK
-
Done!
How to Remove Gridlines in Excel 3: Changing the Background Color
-
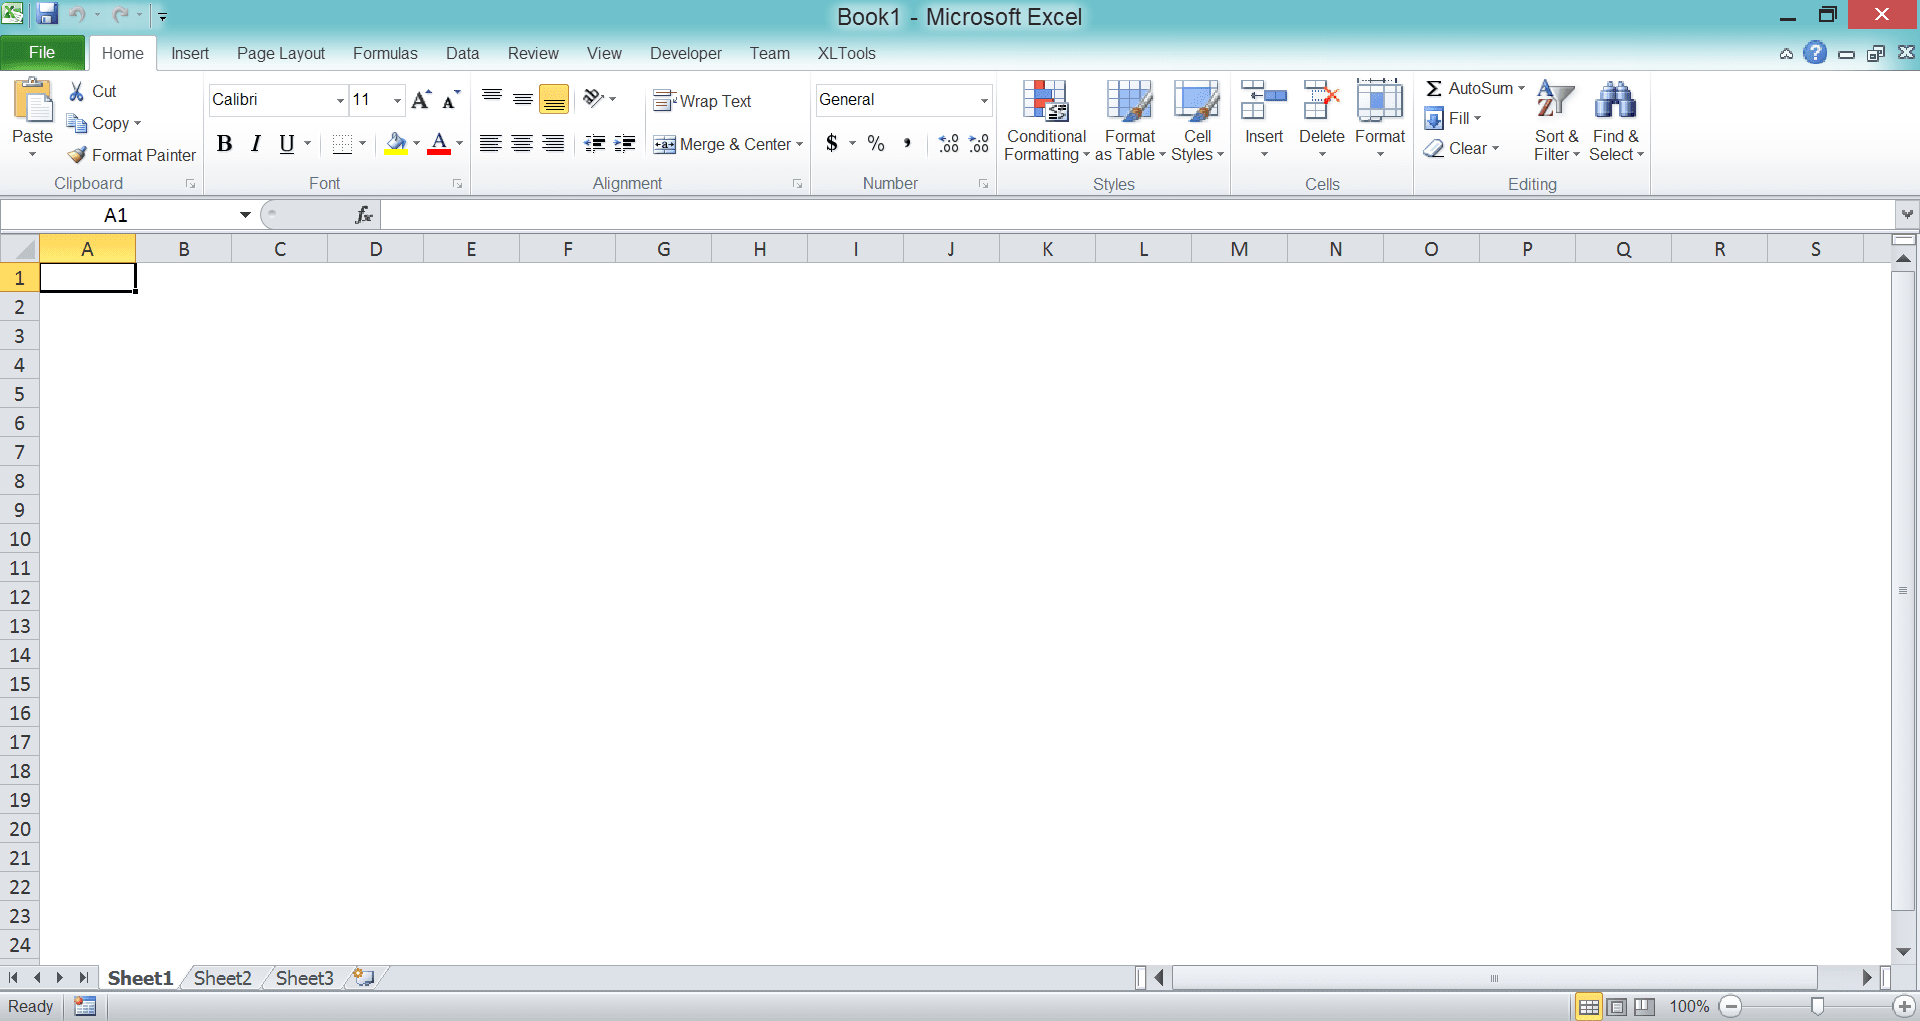
Highlight the cell range where you want to remove the cells’ gridlines from. If you want to remove all the gridlines in your worksheet, press Ctrl + A (Command + A for Mac) to highlight your whole worksheet

-
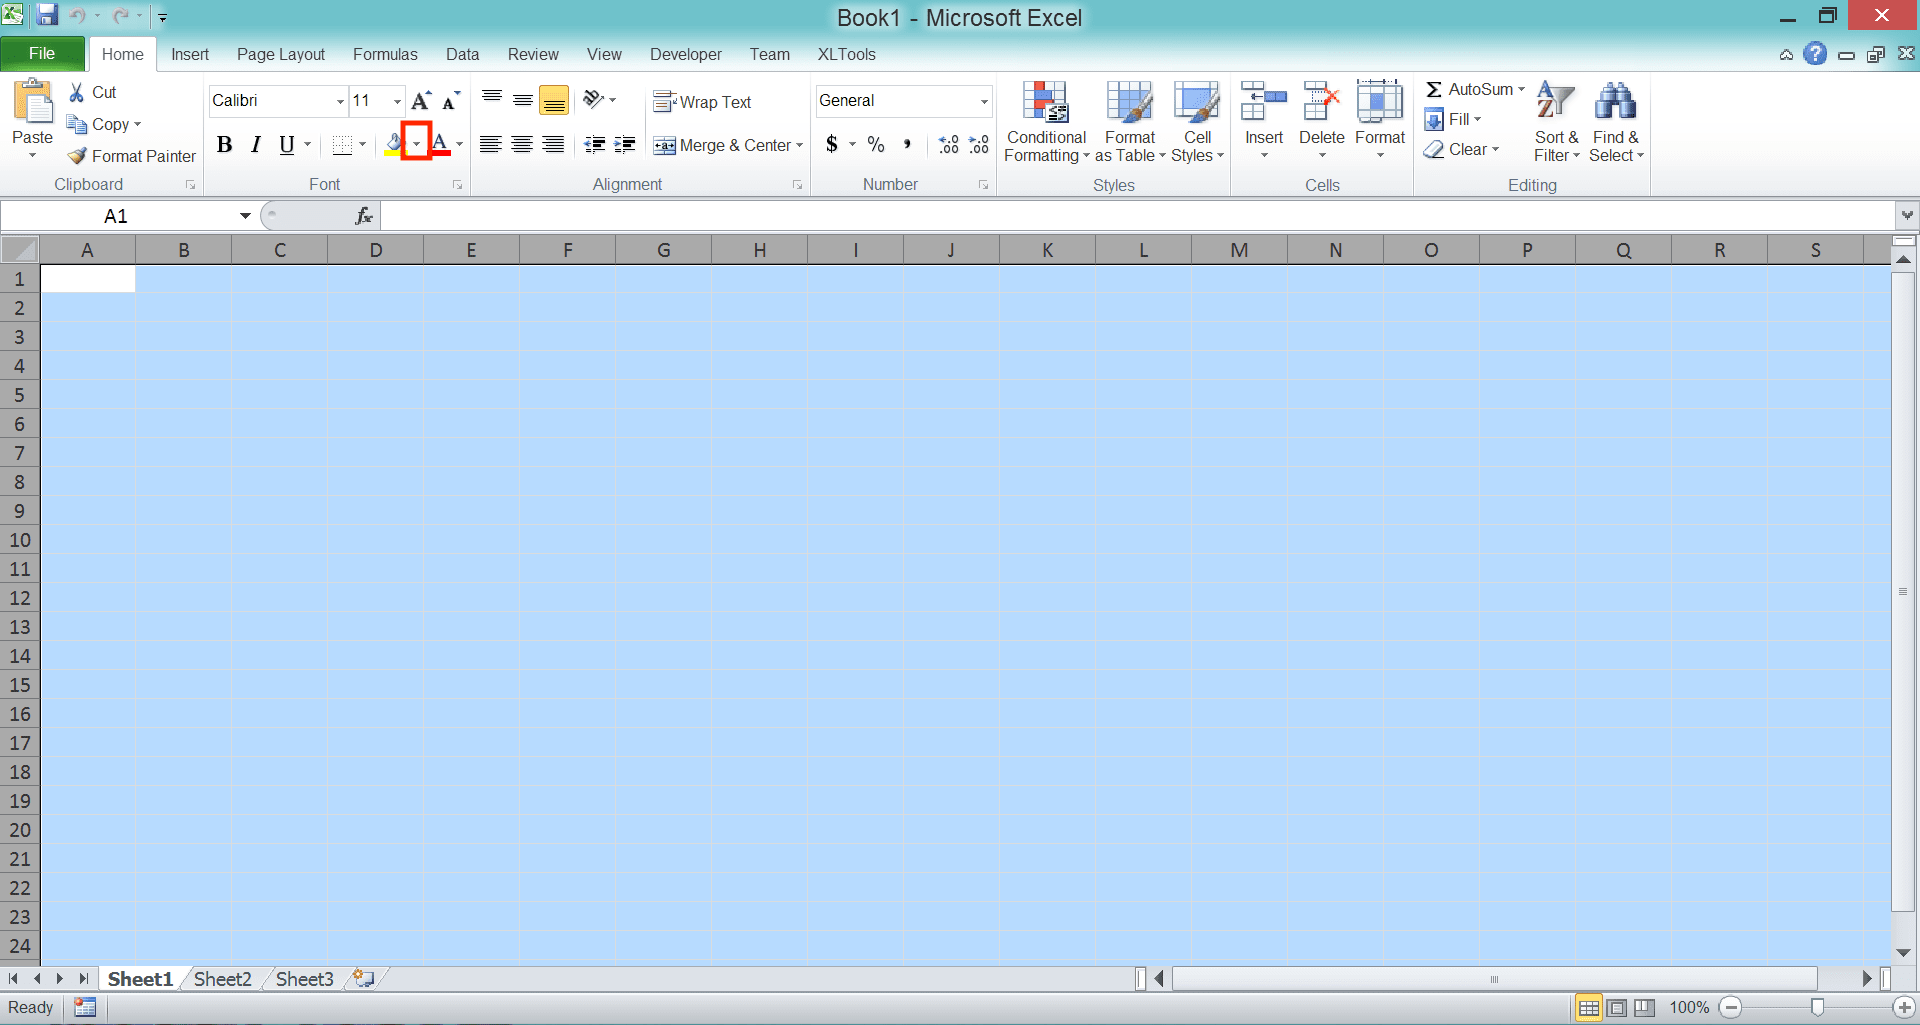
Click the Fill button dropdown in the Home tab
-
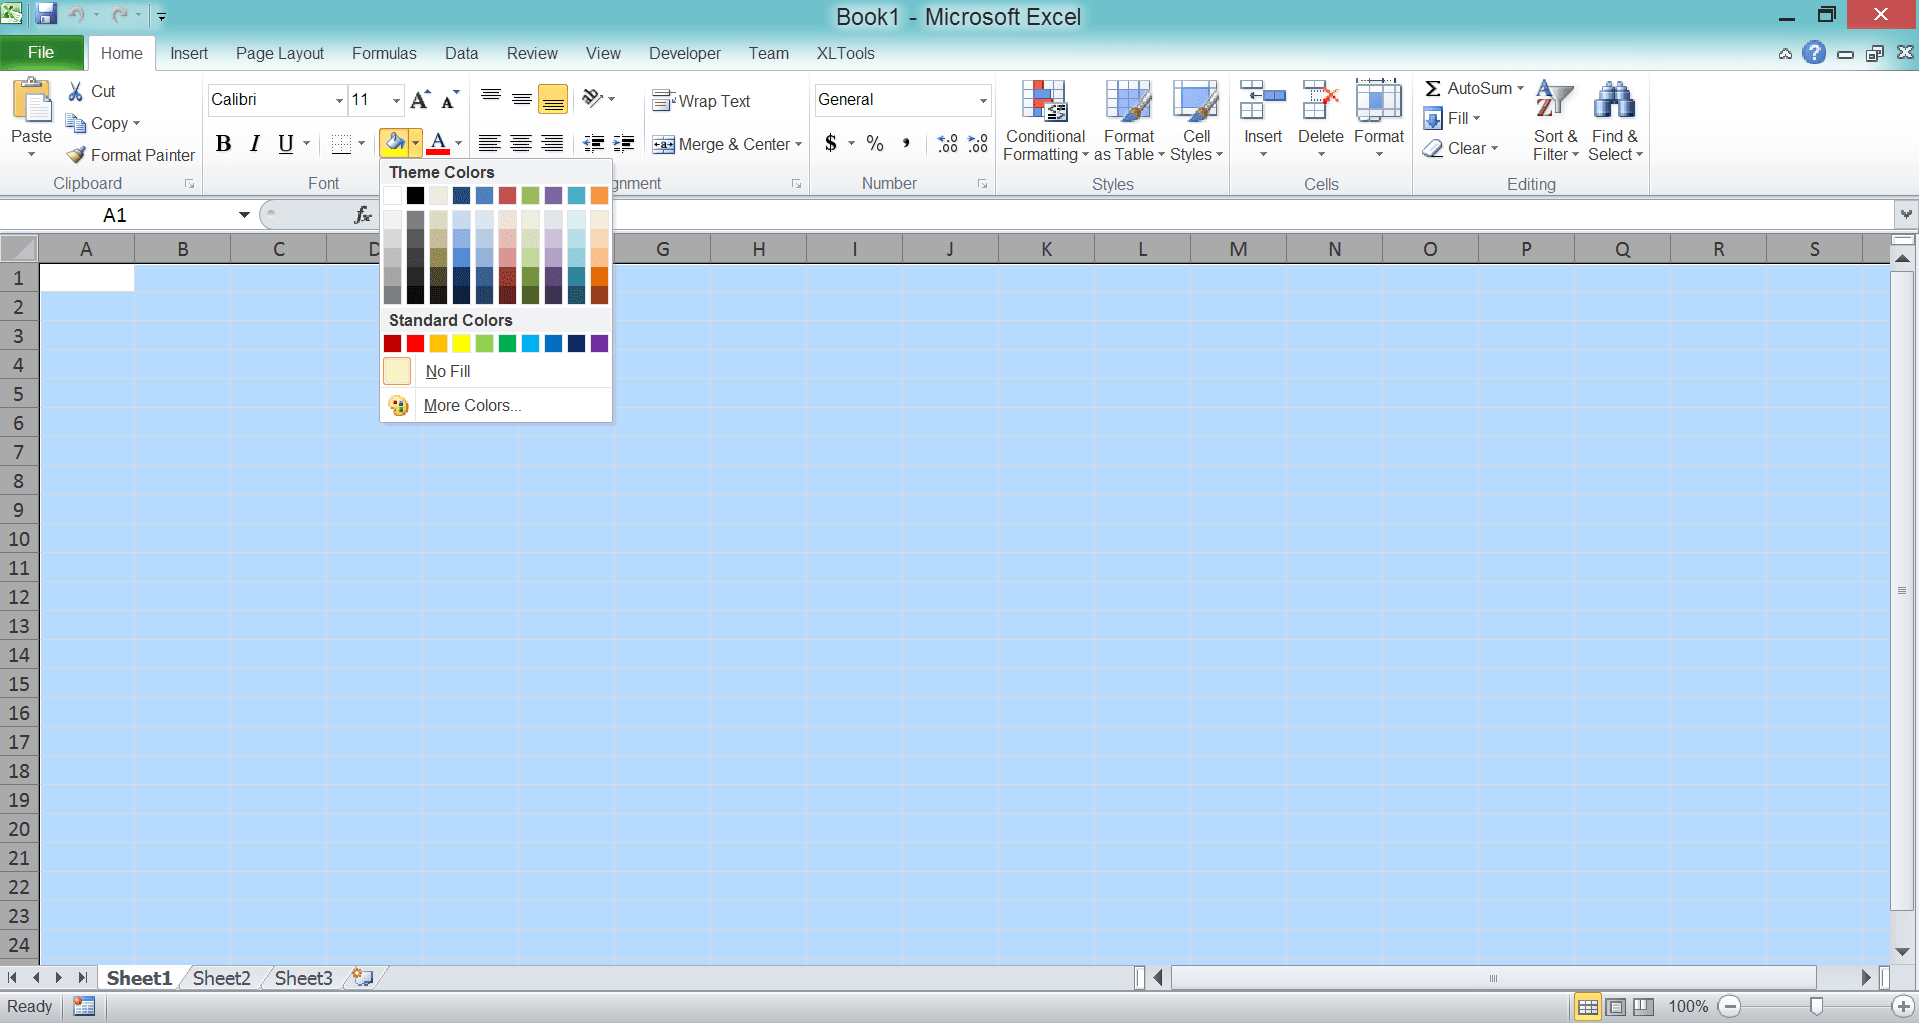
Pick the color you want for the background of the cell range you highlight (pick white if you want the color to be like the default color)
-
Done!

How to Remove Gridlines in Excel 4: Merge Cells
Note: The use of this method will make the cells from where you remove your gridlines merge. Use this method if cell merging is something you are okay with for your cell range.-
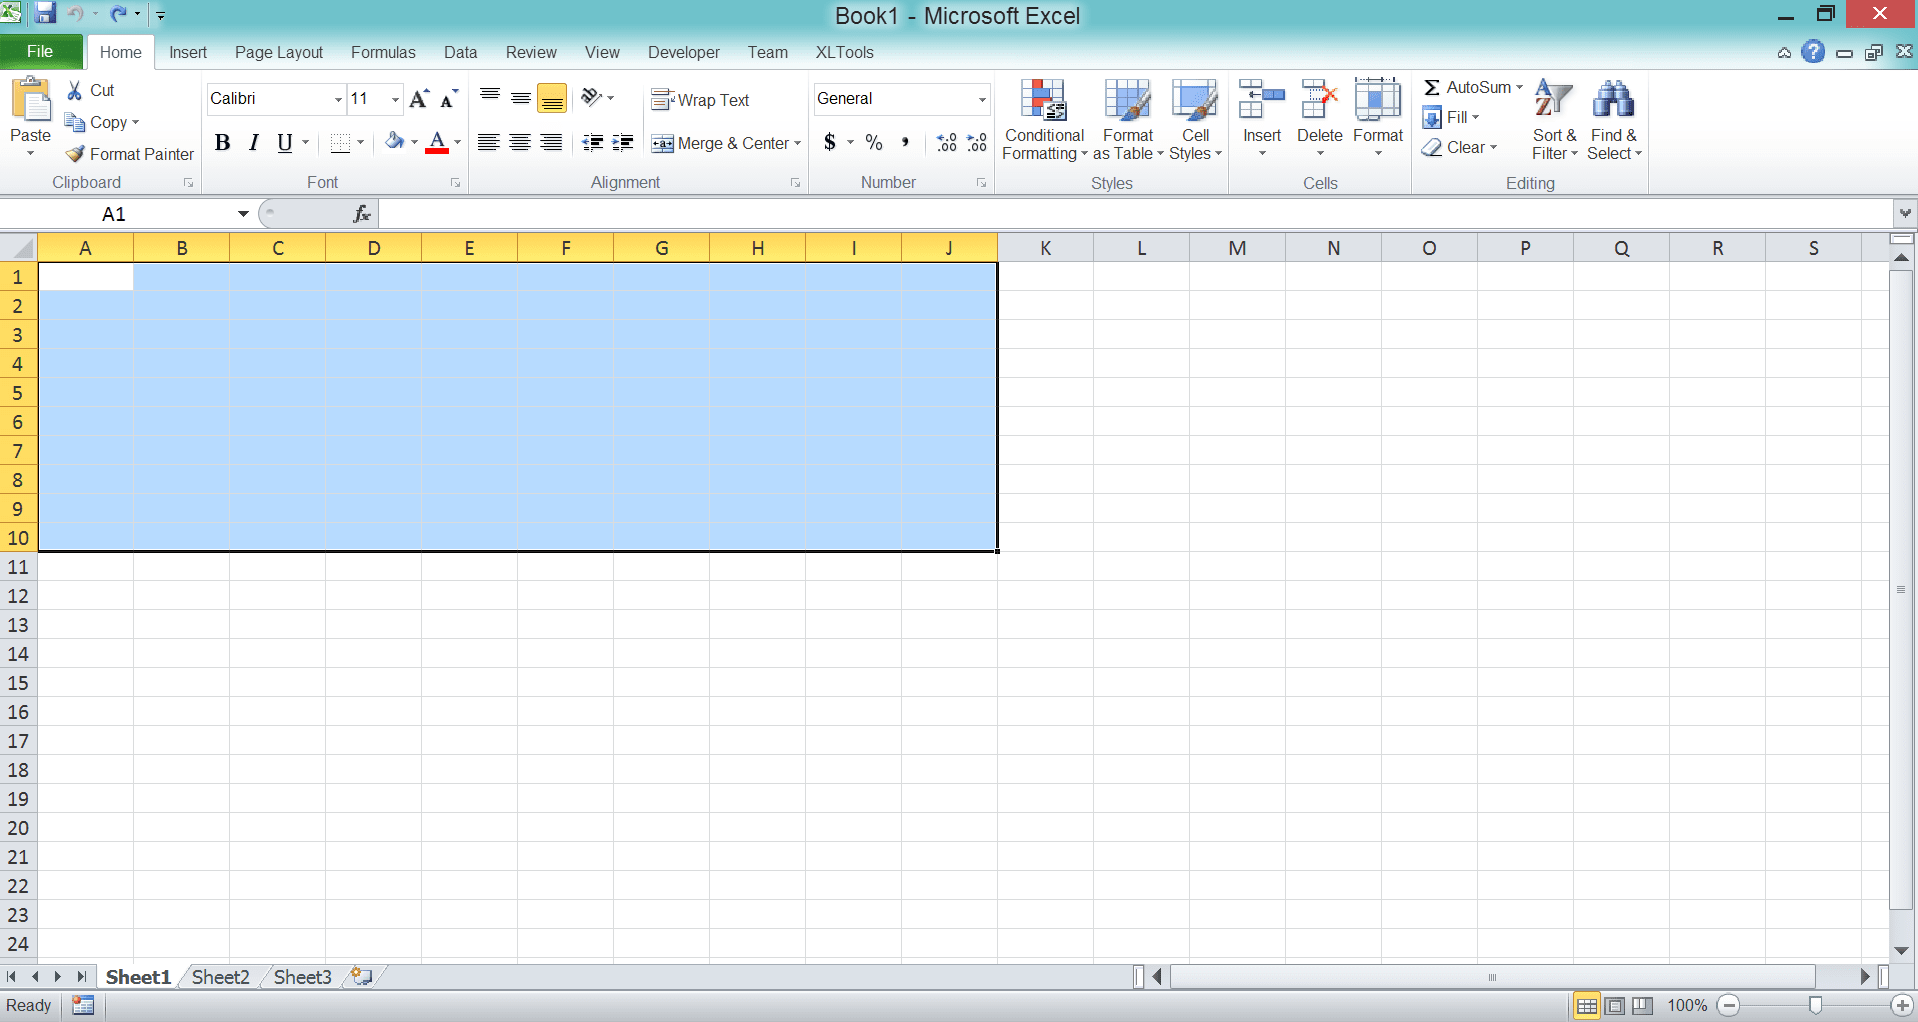
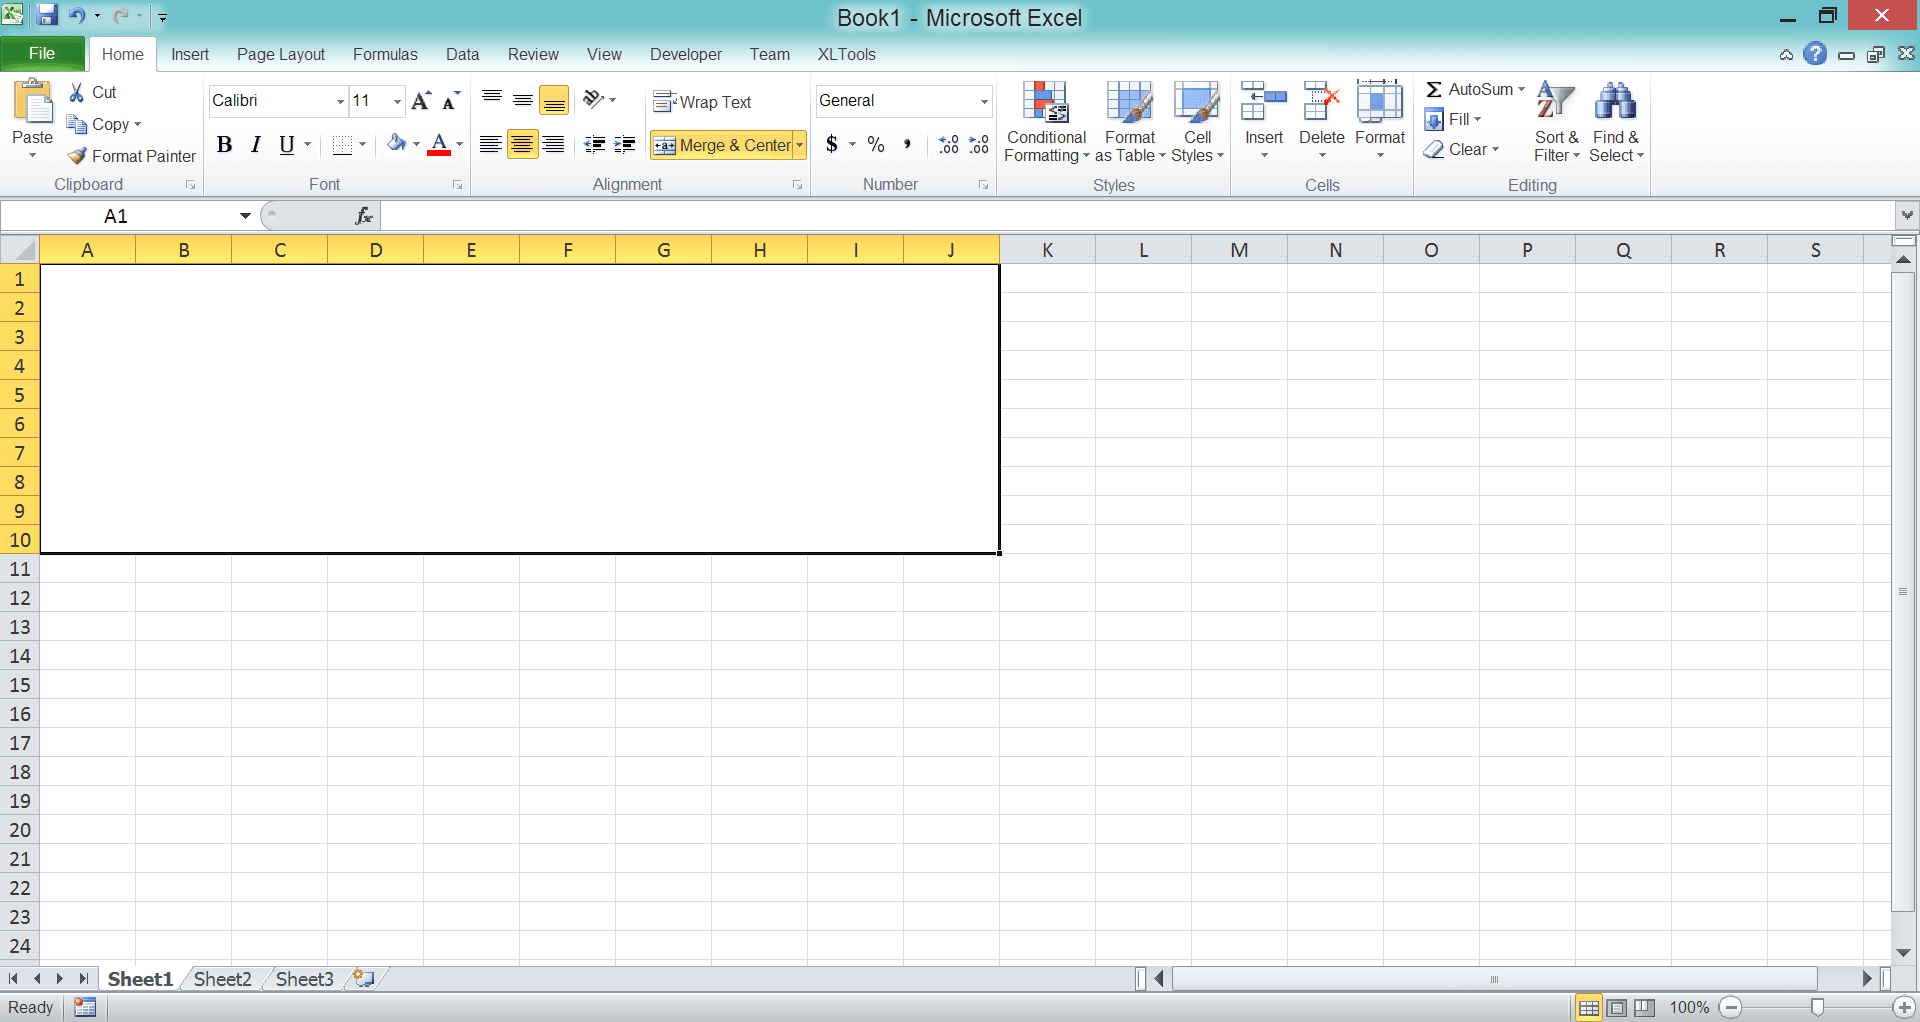
Highlight the cell range from where you want to remove the gridlines
-
Click the Merge & Center button in the Home tab

-
Done!
How to Remove Gridlines in Excel 5: The Shortcut Buttons
This shortcut only works if you use a Windows OS.Press Alt then W then V then G or Alt then P then V then G. This shortcut is actually a shortcut to access the gridlines checkbox in your excel View/Page Layout tab.
Exercise
After you understand how to use the methods above, now is the time for you try them in your own excel. Open your excel file and try to remove its gridlines by using each method that you learn from above. Can you do it? Which method do you prefer to use?Additional Note
If you want to print the gridlines instead, go to the Page Layout tab and check the Print Gridlines checkbox.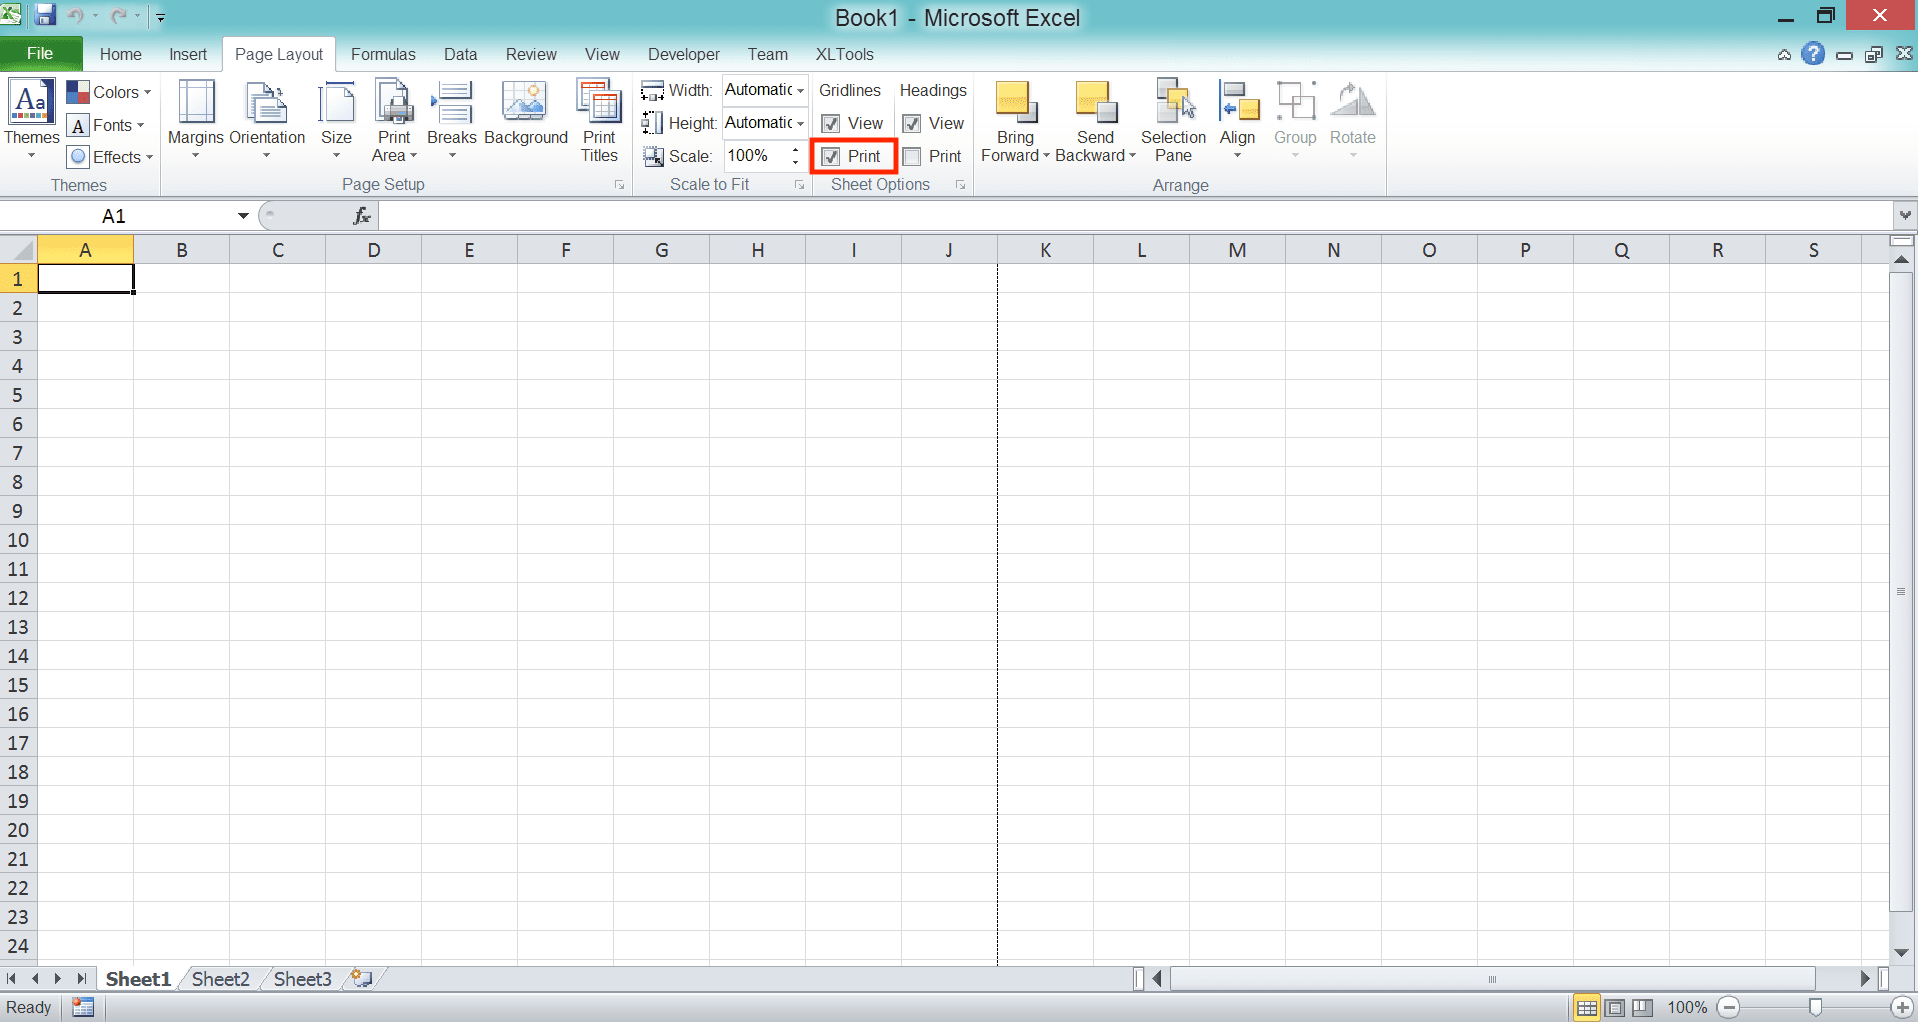
Other tutorials you should learn:


