Data Validation in Excel: Functions and How to Use It
Home >> Excel Tutorials from Compute Expert >> Excel Tips and Trick >> Data Validation in Excel: Functions and How to Use It


In this tutorial, you will learn about the data validation feature in excel completely.
When we work in excel, we sometimes need to limit the input that can be given to some cells. This might be because wrong inputs can produce errors in our data processing results. Another reason is we might just expect some kind of responses from other people we ask to input something into our worksheets.
Whatever the reasons might be, we need to know how to give limitations to the possible inputs in our cells. Thankfully, Excel has a feature to help us here called data validation.
If we have mastered the way to use this data validation feature, we should be able to work in excel much more optimally. This is why Compute Expert creates this tutorial if you need to learn more about this useful feature in excel.
Want to know about data validation and understand the way to use it in excel? Read this tutorial until its last part!
Disclaimer: This post may contain affiliate links from which we earn commission from qualifying purchases/actions at no additional cost for you. Learn more
Want to work faster and easier in Excel? Install and use Excel add-ins! Read this article to know the best Excel add-ins to use according to us!
Table of Contents:
- What is data validation in excel?
- Data validation functions in excel
- Data validation limitation
- Data validation types in excel
- Data validation tabs
- Data validation example
- How to create data validation in excel
- How to create data validation in excel (any value)
- How to create data validation in excel (whole number)
- How to create data validation in excel (decimal)
- How to create data validation in excel (list)
- How to create data validation in excel (date)
- How to create data validation in excel (time)
- How to create data validation in excel (text length)
- How to create data validation in excel (custom)
- How to edit data validation in excel
- How to copy data validation in excel to other cells
- How to find cells with data validation
- How to circle invalid data based on our data validation in excel
- How to remove data validation in excel
- Cannot apply data validation in excel? Possible reasons and solutions
- Tips to use data validation in excel
- Exercise
- Additional note
What is Data Validation in Excel?
Data validation in excel is a feature that allows you to accept only certain kinds of inputs and rejects other inputs you don’t want for a cell. The input limitation can be set according to the data type and range you prefer.Data Validation Functions in Excel
Some functions of the data validation feature are:- Limit the input that a cell can accept
- Restrict the data type of a cell content
- Give instructions on how people should give their input
If you need certain kind of data for the data processing you want to do in excel, then data validation can be a huge help for you. After all, it can make you get the kind of data you want by enforcing its rules when someone tries to give an input to a cell.
Data Validation Limitation
People can easily remove data validation in a cell by copying a cell content with no data validation to a cell with the data validation.Thus, you shouldn’t use data validation for security purposes. You should use it as a way to limit people’s inputs so they don’t make your excel work results go awry.
Data Validation Types in Excel

There are eight types of data validation you can use on a cell. They are:
- Any value: This is the default settings of a cell in excel. You can give any kind of input to a cell with this data validation type
- Whole number: Data validation that only lets people give a whole number input into it
- Decimal: Data validation that only lets people give a number (whole number and decimal) input into it
- List: Data validation that only lets people give input from several predetermined choices. We usually use a dropdown to select the input we want to give for a cell with this validation type
- Date: Data validation that only lets people give a date input into it. You can input the time with the date if you want. Moreover, you can also input a number as long as it can be represented by date in excel
- Time: Data validation that only lets people give a time input into it. You can input a date with the time being counted as 00:00:00. You can also input a number as long as it can be represented by time in excel
- Text length: Data validation that limits the number of characters people can input into a cell
- Custom: Data validation that limits the input given on a cell based on a formula evaluation process
You can use whichever data validation type suits your needs the most.
Data Validation Tabs
There are three tabs you can manage in the data validation dialog box when you want to apply data validation on your cell. Here are they with a brief explanation for each of them.Data Validation Settings Tab

The first tab in the excel data validation dialog box is the settings tab. This is the main tab of the dialog box and probably the only tab you manage to set the data validation in your cell.
Here, you can determine the input rule for your cell. You can select the data type and/or the range of data you accept.
There is an “Ignore Blank” checkbox here to let excel knows whether you allow a blank input or not for your cell.
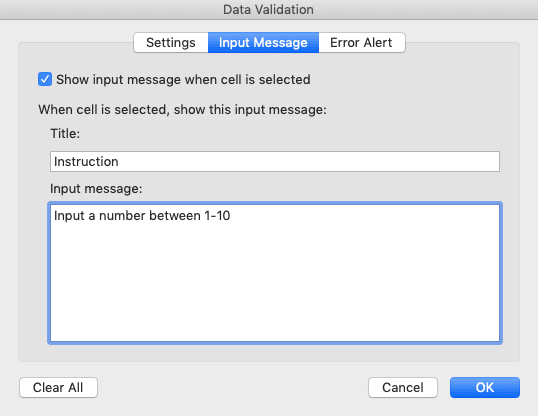
Data Validation Input Message Tab

The input message tab is the second tab we have in the data validation dialog box. This tab allows you to give a custom message when people move their cell cursor to the cell with the data validation. The custom message is usually an instruction on what kind of input people should give into the cell.
For example, if we set a data validation rule on our cell where we only allow a 1-10 number input, we can put something like this in our input message tab.
When people move their cursor to the cell with the data validation rule, a message will show up like this.

Using the custom message should help people to understand better what should they input in the cell.
If you don’t input anything on this tab, then your cell won’t show any message when people move their cursor to it.
Data Validation Error Alert Tab

The third tab allows you to show a dialog box with a custom message to people who enter a wrong input in the cell with your data validation rule. There are three types of the dialog box you can choose: Stop, Warning, and Information.
The Stop dialog box will prevent people from inputting anything other than what you want in your data validation rule. They should retry their input if they input wrongly or they cannot input anything into it.

The Warning dialog box allows people to input something other than what your data validation rule wants. In the dialog box, it will give a choice for people to leave their wrong input as it is or to retry their input.

The Information dialog box is the “softest” of the three dialog box types. It will only give a custom message that you create yourself when people input something other than what your data validation rule wants. The custom message usually includes what they should input instead.

If you don’t give any input to this tab, there will be a Stop dialog box when people give the wrong input to your cell. The message in the dialog box will be a standardized one provided by excel.
Data Validation Example
Here is an example of data validation in action.
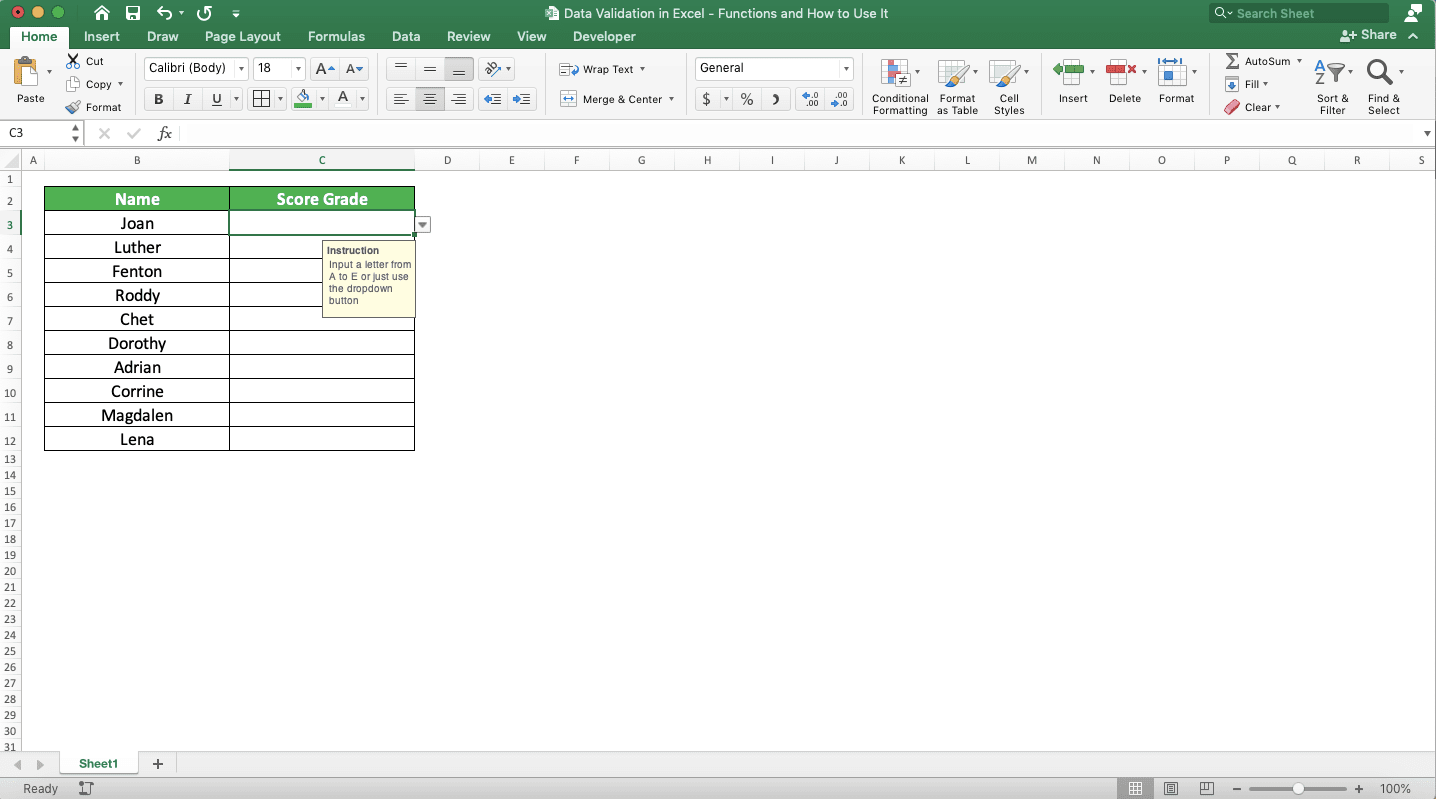
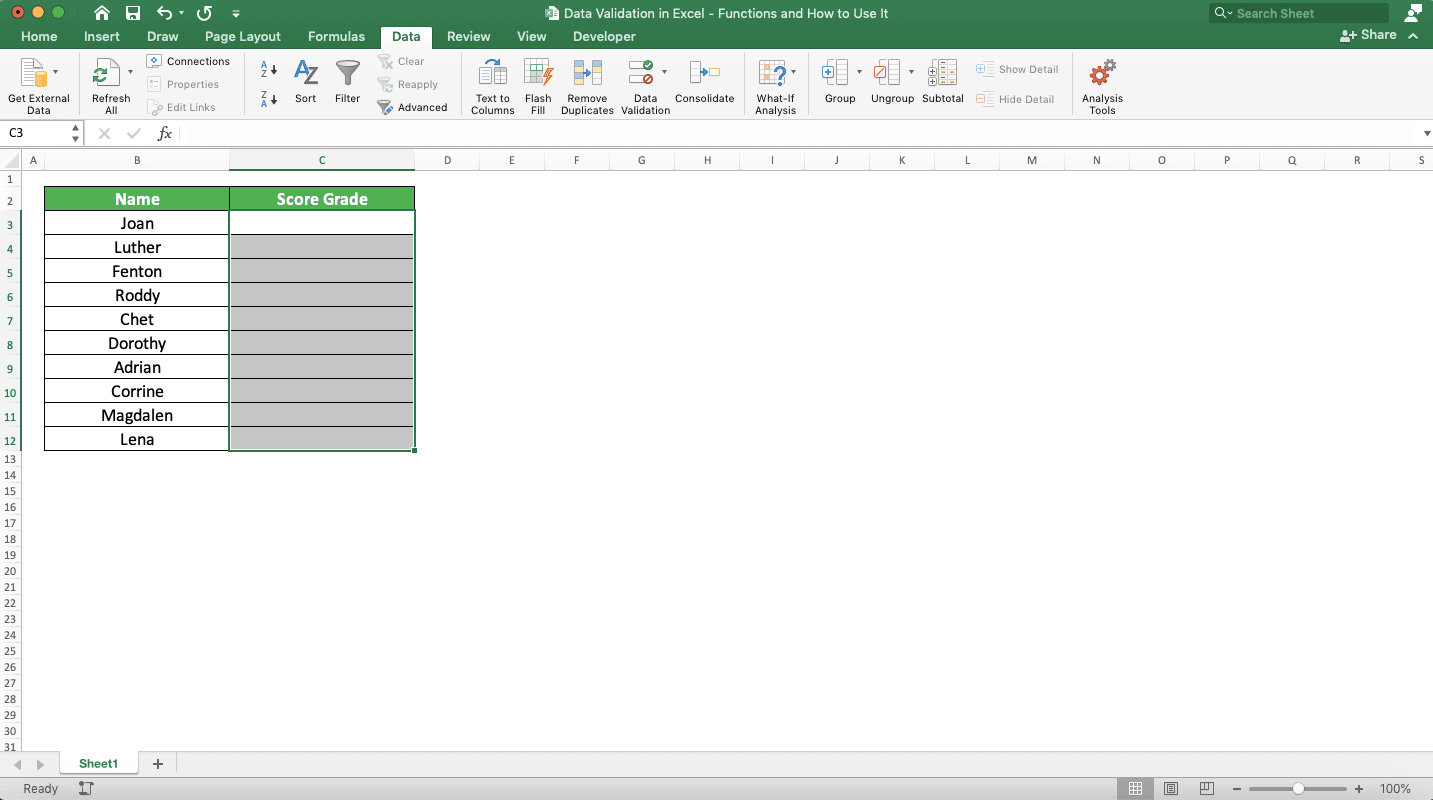
In this example, we want to fill the cells in the “Score Grade” column with the letter A to E. As we want this input only for the cells, we apply the data validation feature to them.
We also set an input message and an error alert to make it clear what kind of input we expect for the cells. As you can see, when we move our cell cursor to one of the score grade cells, we get a message like this.
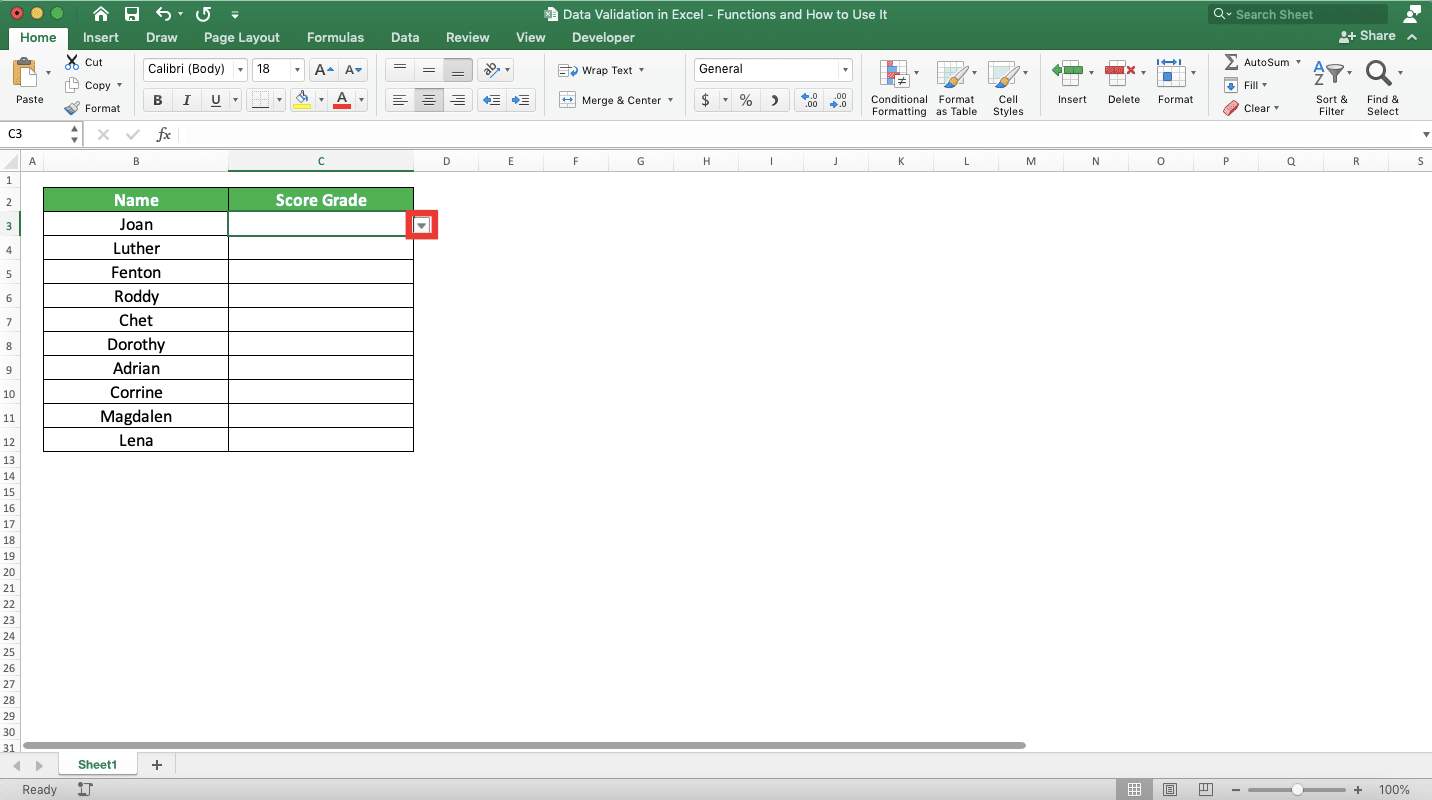
We use the “List” data validation type here that can give a dropdown to the cells. Thus, we can click on the dropdown button and select the input that is accepted on the cells.

When we input something other than an A-E letter, we get a Stop type dialog box with a custom message like this.

With the data validation in place, we can limit the input to our cells according to our preference.
How to Create Data Validation in Excel
Here are the general steps to create data validation on a cell in excel.-
Select the cell/cell range where you want to apply your data validation rule

-
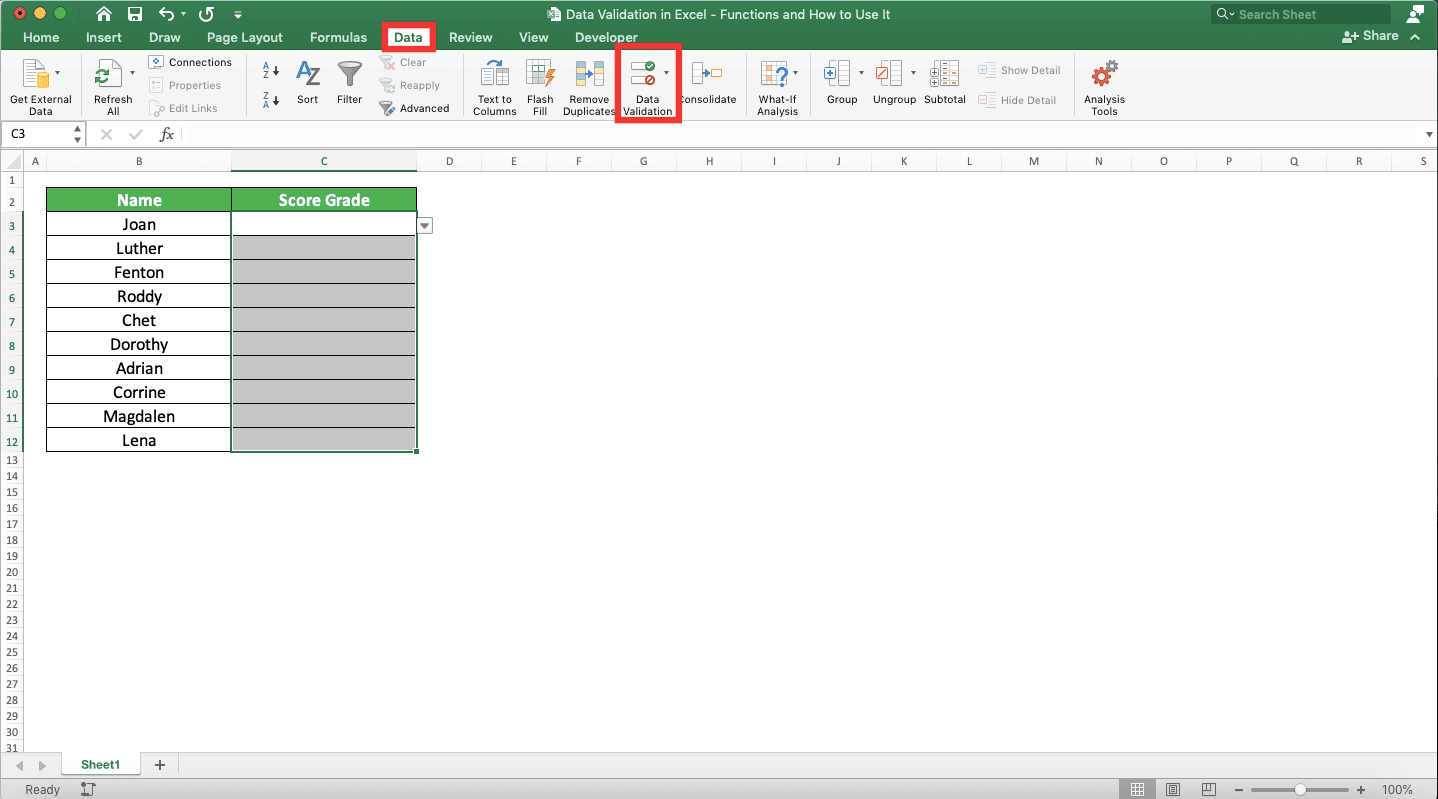
Go to the Data tab in your ribbon and click the Data Validation button there

-
In the dialog box that shows up, set the data validation rule you want in the Settings tab. Don’t forget to determine whether you allow a blank input or not with the “Ignore Blank” checkbox (check it if you allow it and uncheck it if you don’t)
-
If you want, create a custom input message you want for your cell(s) on the “Input Message” tab of the dialog box

-
If you want, create a custom error alert dialog box when people input something other than what your data validation rule wants on the “Error Alert” tab of the dialog box

-
Click OK

-
Done!

And the following is a brief on how to create a rule for each type of data validation.
How to Create Data Validation in Excel (Any Value)
Since this data validation type is the default setting in your cell and it allows any input, you don’t have to do anything if you want this data validation type. Just leave your cell be.If you have changed the data validation type of your cell and you want to go back to this Any Value type, just choose it in the data validation dialog box settings tab.

How to Create Data Validation in Excel (Whole Number)
For the whole number data validation type, you just need to determine the range of the whole number input you allow. Do that by managing the “Data” dropdown there and the text box(es) below it.
You can input the text box by typing your number directly or by using a cell reference.
How to Create Data Validation in Excel (Decimal)
Similar to the whole number type, you also need to determine the range of the decimal number input for your data validation rule.
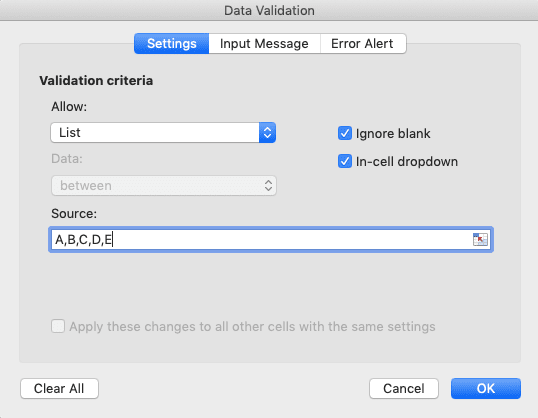
Cara Membuat Data Validation di Excel (List)
The list data validation type allows inputs that match one of the values you determine. To determine what those values are, type them in the “Source” text box. Separate each value with a comma sign ( , ).
You can also input a cell range or the name of a named range if your preferred values are there.
With this list type, you have the option to add a dropdown which choices are the values you allow in your cell. If you want the dropdown, make sure the “In-cell dropdown” checkbox there is checked. If you don’t want a dropdown, just uncheck it.

If you choose to add a dropdown, there will be a dropdown button people can click to show the dropdown when they are in the cell with the list data validation type.
To learn more about how to create a proper dropdown in excel, check out this tutorial.
How to Create Data Validation in Excel (Date)
For the date data validation type, you need to determine the date range you allow for your cell input. If you type in the available text box(es) to determine the range, make sure to type a proper date recognized by excel. Something like “11/2/2020” or “11-2-2020” for 11 February 2020 should suffice.
If you don’t want to bother with typing the date, just use a cell reference.
How to Create Data Validation in Excel (Time)
Similar to date, you need to determine the range of time you allow as your cell input here.Use a cell reference or type a proper time format if you type in the text box(es) to determine the time range. Something like 09:00:00 for 9 AM should be enough.

How to Create Data Validation in Excel (Text Length)
Input the range of the number of characters you want for the cell input. Just don’t input a negative number since, of course, text length cannot be negative.
How to Create Data Validation in Excel (Custom)
The custom data validation type is quite special because it allows you to make formula as your data validation rule. The formula result should be a TRUE logic value for it to work.If it is FALSE, then your cell will reject all the inputs you give to it. If the result is not a logic value or an error, there will be no data validation in place on your cell.

Let’s discuss some examples of formulas you can use for this custom data validation type and their results.
Assume that the cell where you want to apply the data validation rule is the A1 cell. If you want all your input letters to be upper case, you can type in something like this in the “Formula” text box.
= EXACT ( A1 , UPPER ( A1 ) )
If you want the input to have “XYZ” characters in it, you can type in a formula like this.
= ISNUMBER ( FIND ( ”XYZ” , A1 ) )
And if you want two or more rules at the same time, you can use an AND or OR function. For example, if you want your cell to have an odd number or a number more than 30, you can use this formula.
= OR ( ISODD ( A1 ) , A1 > 30 )
As long as you can create a formula that produces TRUE, you can set whatever rule you want for your data validation!
How to Edit Data Validation in Excel
To edit the data validation you have made in excel, just go through the steps of creating data validation in excel again. When you have opened the data validation dialog box, change its values into the data validation rule you want.
If you want to apply the change to other cells with the same data validation rule, check the “Apply these changes to other cells with the same settings” checkbox in the dialog box.

Doing that can simplify your work as you don’t have to change the data validation rule in other cells one by one.
How to Copy Data Validation to Other Cells
Do this if you want to copy only the data validation rule of a cell to other cells.-
Select the cell with the data validation rule you want to copy

-
Press Ctrl + C (Command + C on Mac) buttons or right-click on the cell and choose Copy

-
Select the cell/cell range where you want to copy the data validation rule on

-
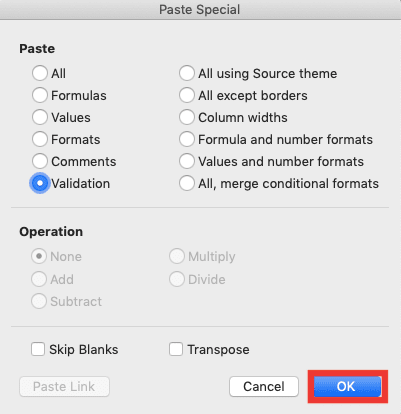
Go to the Home tab in your ribbon, click the Paste dropdown button there, and choose Paste Special…

-
In the Paste section on the dialog box that shows up, choose Validation

-
Click OK
-
Done!

Note that if you copy a custom data validation rule, the cell reference in its formula will move along with where you copy the rule. That is unless you put $ symbols in the cell reference.
How to Find Cells with Data Validation
To find all the cells in a worksheet with a data validation rule, just do these steps.Go to the Home tab in your ribbon, click the Find & Select button there, and choose Data Validation from the dropdown choices.
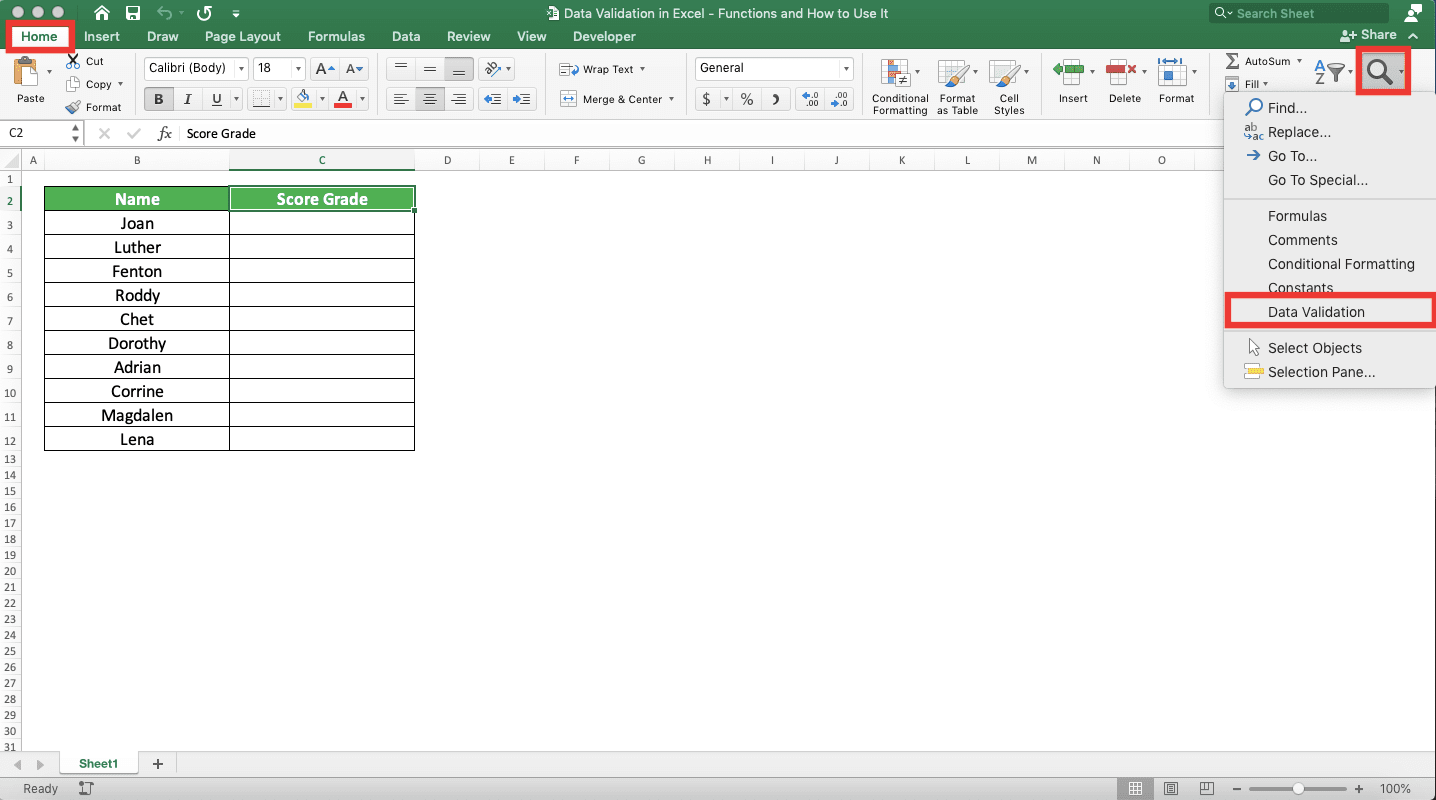
Doing that will make excel highlight all the cells with a data validation rule in your current worksheet.

How to Circle Invalid Data Based on Our Data Validation in Excel
After you just apply a data validation rule to your cells, you might want to know which cells contain data not align with the rule currently. To know that, just go to the Data tab in your ribbon, click the Data Validation dropdown button there, and choose Clear Invalid Data from the dropdown choices.
Doing that will make excel circle all the cells with data that doesn’t align with their data validation rule.

In case you are wondering, the data validation rule in the example is the cells must contain either an A, B, C, D, or E letter.
If you need to remove the circles, just click the Data Validation dropdown button again and choose Clear Validation Circles.

How to Remove Data Validation in Excel
Need to remove the data validation rule you have in your cells? Here are the steps you should follow for that.-
Highlight the cell/cell range which data validation rule you want to remove

-
Go to the Data tab in your ribbon and click the Data Validation button there
-
In the dialog box that shows up, click the Clear All button

-
Click OK

-
Done!
Cannot Apply Data Validation in Excel? Possible Reasons and Solutions
Cannot seem to apply data validation on your cells no matter what you do? Here are the possible reasons and the solution for each of the reasons.- You are in the edit mode of your cell. If you are in the edit mode of your cell, you cannot access the data validation feature. Press the Escape button to get out of the edit mode, highlight the cell, and try again
- Your cell might be locked. Locked cells usually make you cannot apply a feature like data validation to them. Unprotect your sheet or manage the cells lock settings first before you protect your sheet
- If you use a custom data validation rule, your formula might be wrongly written. As previously mentioned, a formula that produces an error or not a TRUE logic value will make a custom data validation cannot work. You also probably haven’t referred to your cell in the formula. Check again your formula writing and make sure that everything is in place for your data validation rule to run
Check these three things above and make sure you don’t make those mistakes.
Tips to Use Data Validation in Excel
Last but not least, here are some tips you can implement to use the data validation feature more optimally.- Use a cell/cell range/named range reference on your data validation rule to make it more flexible. Changing the value reference of your cells’ data validation rule can take much time if you need to open the data validation dialog box from time to time. If you quite often need to change the value reference, it might be better for you to refer to a cell/cell range/named range. That can make the value change process easier to do
- Try not to use a custom data validation rule if you can. Formula writing can be complicated and you might need to troubleshoot it in the future. The other types of data validation rules are usually simpler and easier to read. Thus, you should use the custom data validation rule only if you need to
- Give a clear input message and error alert if you expect the cells with data validation to be inputted by other people. Although you don’t need to set them by default, input messages and error alerts can be helpful when other people need to fill cells with your data validation rule. If you can, add them so people can understand what to do better and can finish their input process much quicker
Exercise
After you have learned about the data validation feature in excel completely, try to do the following exercise. This is so you will have a much better practical understanding of the lessons in this tutorial.Download the exercise file and do the following instructions. Download the answer key file if you have done the exercise and want to check your answers.
Link to the exercise file:
Download here
Instructions
Do each instruction below in the appropriate cell according to the instruction number.- Add a data validation rule where the date input in the cell should be later than 18 November 2031!
- Add a data validation rule where the cell input is restricted to the list of fruits on the right! Give a dropdown button too on the cell
- Add a data validation rule where the input must have “.com” and no longer than 100 characters! Use AND, ISNUMBER, FIND, and LEN functions to help you with this!
Link to the answer key file:
Download here
Additional Note
Data validation can be a great help when you need to make something like a form in excel.Other tutorials you might want to learn: